
To start your vanishing-edge plaster project, begin by preparing your workspace—clear debris, guarantee good lighting, and gather all needed materials. Next, set up a sturdy, level framework for the edge. Apply a waterproof layer, then shape and smooth the plaster to create a seamless, floating effect. Proper curing and detailed finishing are key for durability and aesthetic appeal. Keep working through each step carefully, and you’ll discover more tips to perfect your project as you continue.
Key Takeaways
- Prepare your workspace thoroughly, ensuring cleanliness, proper lighting, and material readiness before starting work.
- Establish a stable foundation and accurately assemble the edge framework to ensure long-term stability.
- Apply waterproofing sealant carefully along edges and joints to prevent future leaks and damage.
- Shape and refine the vanishing edge profile with precision to achieve a seamless, professional appearance.
- Conduct thorough inspections and proper curing to ensure a flawless, durable finish and easy maintenance.
Assessing and Preparing Your Workspace

Before you begin working on your vanishing-edge plaster, it is vital to assess and prepare your workspace carefully. Clear the area of any obstacles or unnecessary items that could interfere with your work. Confirm your workspace is well-lit, so you can see every detail clearly. Check that you have enough space to move freely around the area, especially near edges and corners. Protect surrounding surfaces with drop cloths or plastic sheeting to prevent splatters and damage. Make sure your workspace is clean and dry, as dust and moisture can affect plaster adhesion and finish. Ventilate the area if possible to reduce dust buildup and fumes. Proper preparation minimizes mistakes and creates a safer, more efficient environment for your project. Additionally, understanding the importance of proper ventilation can help mitigate fumes and dust, ensuring a safer working environment.
Gathering Materials and Tools
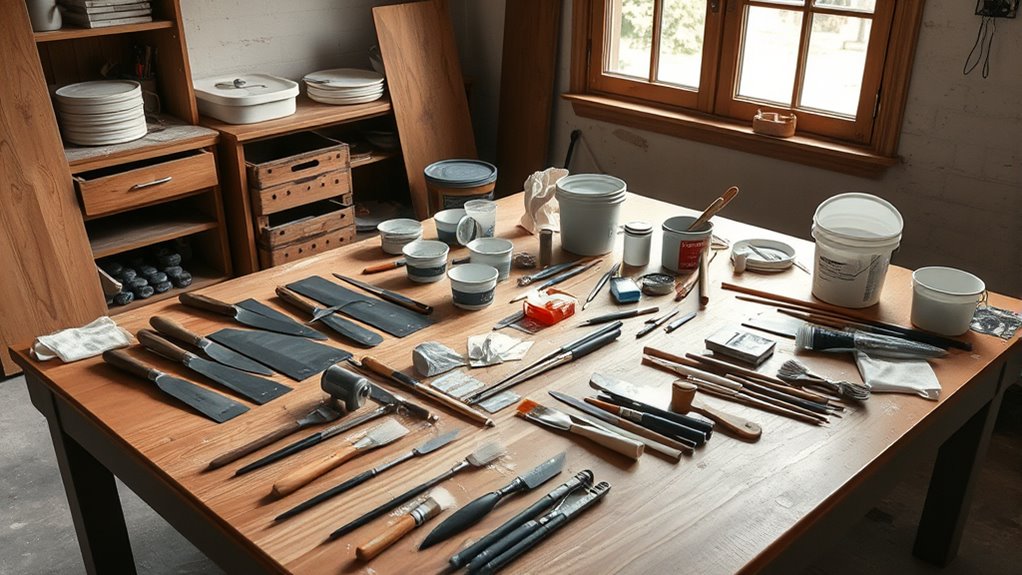
To guarantee your vanishing-edge plaster project goes smoothly, gather all the necessary materials and tools before you start. You’ll need quality supplies to assure a professional finish. Here’s a quick list of essentials:
| Material / Tool | Purpose | Quantity/Notes |
|---|---|---|
| Portland Cement | Base plaster | 50 lbs |
| Waterproof Sealant | Prevents leaks | 1 gallon |
| Trowels | Applying and smoothing plaster | 2-3 |
| Mixing Buckets | Mixing plaster | 2 |
| Level | Ensures proper slope | 1 |
Prepare these in advance to avoid delays. Double-check your list, and make sure everything is clean and ready to go. Additionally, understanding the importance of proper surface preparation can significantly influence the durability and appearance of your plaster finish.
Setting Up the Vanishing-Edge Framework

To set up the vanishing-edge framework, you need to start with proper foundation preparation to guarantee stability. Next, assemble the edge framework carefully, making sure all components are level and secure. Finally, apply waterproofing and sealing to protect the structure from water damage and ensure long-lasting performance. Incorporating accurate measurements during construction can significantly enhance the overall quality and longevity of the setup.
Foundation Preparation Steps
Setting up the vanishing-edge framework begins with thorough foundation preparation to guarantee stability and precision. You need a solid base to support the entire structure and prevent future issues. Start by leveling the ground meticulously, ensuring no dips or high spots. Then, install a sturdy base layer, like compacted gravel or concrete, to provide stability and drainage. Finally, mark out the precise dimensions of the vanishing edge to ensure everything aligns perfectly during assembly.
Key steps include:
- Clearing and leveling the site thoroughly
- Laying a stable, well-compacted foundation
- Marking and measuring the edge boundaries accurately
Focusing on these steps creates a reliable foundation, making the subsequent phases of setting up the framework smoother and more precise.
Edge Framework Assembly
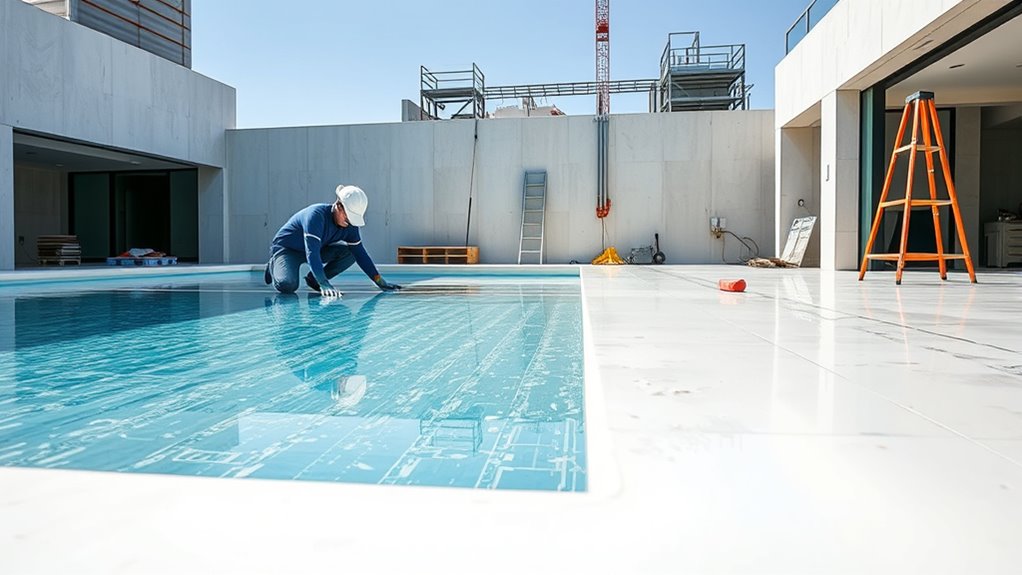
With the foundation prepared and marked, it’s time to assemble the edge framework that will define the vanishing-edge pool. Start by carefully positioning the aluminum or steel supports along the marked perimeter. Ensure each component is level and securely fastened, maintaining the precise slope needed for water flow. Use a level frequently to confirm alignment as you work around the pool edge. Proper assembly creates a sturdy, accurate frame that guides the plaster application and prevents leaks. Additionally, consulting professional guidance can help ensure all components are correctly installed for optimal performance.
Waterproofing and Sealing
As you begin waterproofing and sealing the vanishing-edge framework, focus on creating a reliable barrier that prevents water leaks and guarantees long-term durability. Start by thoroughly cleaning all surfaces to remove dust, dirt, and debris. Apply a high-quality waterproof membrane or sealant along the edges and joints, ensuring complete coverage. Be meticulous around corners and seams, as these are common leak points. Use a putty knife or brush to spread the sealant evenly. For added protection, consider installing a secondary sealant layer. Regularly inspect your work for gaps or missed spots. Remember, a well-sealed framework is essential to prevent water infiltration and maintain the edge’s integrity over time. Proper waterproofing sets the foundation for a successful vanishing-edge plaster project. Materials range from ceramic to recycled products, so selecting eco-friendly options can enhance sustainability and durability over the long term.
Applying the Base Coat and Creating the Edge Profile
Before applying the base coat, make sure your surface is clean and properly prepared. As you spread the base coat, aim for a smooth, even layer to set a solid foundation. Then, carefully shape the edge profile to achieve a seamless, vanishing edge that blends perfectly with the surrounding surface. To ensure a professional finish, consider the materials needed for candle making to select appropriate tools and techniques that can help in shaping fine details.
Preparing the Surface Properly
To guarantee a seamless vanishing-edge plaster, start by thoroughly cleaning and preparing the surface to remove dust, grease, and any loose material. This ensures proper adhesion and a smooth finish. Once clean, inspect the surface for cracks or imperfections; repair these before proceeding. Next, create the edge profile carefully to establish a sharp, clean boundary. Properly prepared edges help achieve a flawless vanishing effect.
Consider these critical steps:
- Use a wire brush or grinder to remove any residual debris or old coatings.
- Mask off surrounding areas to protect against overspray or accidental damage.
- Ensure the surface is completely dry before applying the base coat, preventing bubbles or peeling.
Preparing well upfront sets the foundation for a professional, durable finish.
Applying the Base Coat Smoothly
Applying the base coat smoothly is essential for a flawless vanishing-edge plaster. You want an even, thin layer that adheres well without lumps or ridges. Use a trowel to spread the mixture steadily, maintaining consistent pressure. Keep a wet edge to prevent seams or streaks. Pay attention to the edge profile, ensuring it’s clean and well-defined. A smooth base coat provides a solid foundation for the final finish. Additionally, controlling the consistency of application ensures optimal adhesion and a professional appearance.
Shaping the Edge Profile
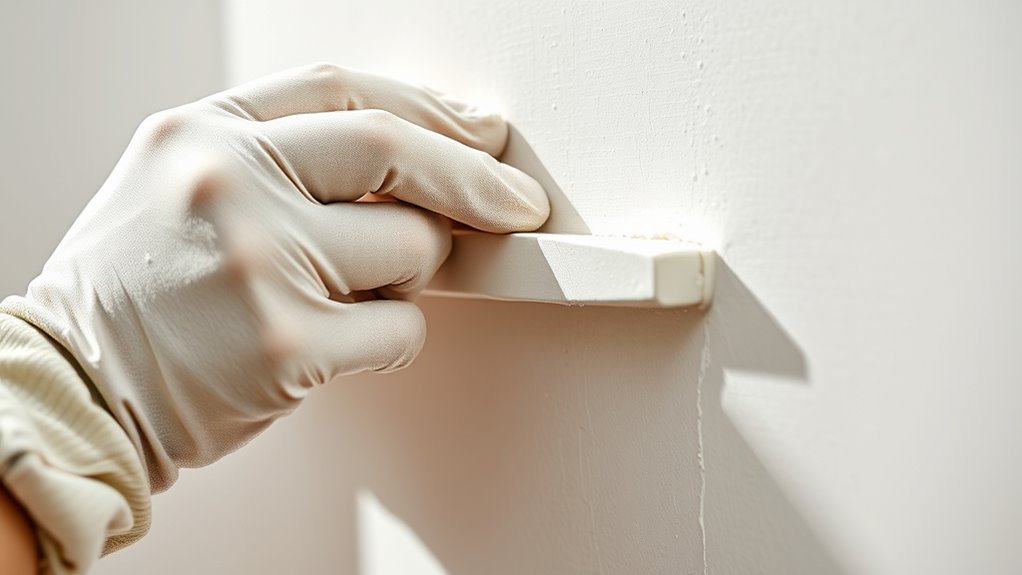
Once you’ve applied the smooth base coat, shaping the edge profile begins by carefully defining the vanishing edge. You’ll want to use your trowel or sponge to carve a clean, consistent slope that blends seamlessly into the surrounding surface. Focus on creating a gentle connection, avoiding sharp angles that can disrupt the illusion of a floating edge. To achieve a professional finish, consider these key points: keep your tools moist to prevent sticking and ensure smooth lines, regularly step back and view the edge from different angles for uniformity, and gently feather the plaster to eliminate ridges or bumps. Incorporating an awareness of design harmony can help you maintain a cohesive aesthetic throughout your project. This process requires patience and attention to detail, but your careful work will result in a sleek, seamless edge that enhances the vanishing effect.
Finishing the Plaster and Achieving a Seamless Look

Achieving a seamless finish with vanishing-edge plaster requires careful attention to detail during the final stages. Start by inspecting the surface closely, smoothing out any imperfections with a damp sponge or trowel. Use a fine-grit sanding sponge to lightly blend the edges and eliminate ridges or tool marks. It’s essential to maintain consistent pressure and motion to avoid creating new flaws. Once the surface appears even, apply a thin layer of finishing plaster or skim coat to fill small imperfections. Feather the edges outward to blend seamlessly into the surrounding surface. Take your time during this process, as rushing can compromise the clean, sharp look you’re aiming for. Proper finishing ensures the plaster looks smooth, uniform, and almost invisible at the vanishing edge. For an optimal result, consider the precision of application techniques to achieve a flawless, professional appearance.
Curing, Final Inspection, and Maintenance Tips
After finishing the plaster, proper curing is essential to guarantee durability and a flawless appearance. During this period, keep the surface moist and avoid any stress or movement that could crack the plaster. Check the surface for any imperfections, such as cracks or air bubbles, and address them promptly. Once cured, inspect the edges carefully to verify a seamless transition and consistent finish. Regular maintenance prolongs your plaster’s lifespan and keeps it looking pristine. Additionally, understanding Rhythm Failure can inspire new decorative techniques that enhance the visual appeal of your project.
Remember to:
- Keep the plaster moist during the initial curing phase
- Conduct thorough inspections for cracks or blemishes
- Clean the surface gently and avoid harsh chemicals
Frequently Asked Questions
How Long Does the Entire Vanishing-Edge Plaster Process Typically Take?
The entire vanishing-edge plaster process usually takes about 7 to 14 days, depending on the project’s size and weather conditions. You’ll need time for surface preparation, plaster application, and curing. During this period, you should monitor the plaster for cracks or imperfections. Patience is key to guarantee a smooth, durable finish. Keep communication with your contractor to stay on schedule and address any issues promptly.
What Are Common Mistakes to Avoid During the Application?
Think of applying vanishing-edge plaster as walking a tightrope—you need balance and precision. Avoid rushing the mixing process to prevent cracks, and don’t skip surface preparation, as it’s the foundation of a seamless finish. Be cautious with the application thickness, as too thick layers can cause uneven edges. Finally, resist the temptation to rush drying times; patience ensures your edge remains flawless and durable.
Can This Technique Be Applied to Curved or Irregular Surfaces?
Yes, you can apply this technique to curved or irregular surfaces. Just guarantee you adapt your tools and methods to follow the contours smoothly, using flexible trowels or brushes. Work in small sections, maintaining consistent pressure and blending edges carefully. Take your time to match the plaster’s thickness and texture, and keep your work even. With patience and the right tools, you’ll achieve a seamless finish on any surface.
What Safety Precautions Should Be Observed During Installation?
You should wear protective gear like gloves, goggles, and a mask to prevent inhaling dust and protect your skin. Make certain proper ventilation in the workspace and handle tools carefully to avoid injuries. Keep the area free of obstructions, and follow all manufacturer safety instructions. Never rush the process, and double-check equipment before use. These precautions help ensure your safety throughout the installation.
How Do Climate Conditions Affect Curing and Adhesion?
Climate conditions critically impact curing and adhesion of vanishing-edge plaster. If it’s too hot or dry, the plaster dries too quickly, risking cracks and weak adhesion. Cold or humid weather slows curing, leading to poor bonding and longer drying times. To guarantee proper adhesion, you should adjust application timing, use appropriate curing methods, and consider climate control measures like shading or heating during installation.
Conclusion
With patience and careful attention, your vanishing-edge plaster will subtly transform your space into a stunning masterpiece. Embrace each step as a gentle dance, allowing your skills to blossom quietly beneath your fingertips. When finished, you’ll find that the seamless beauty quietly invites admiration, almost like a well-kept secret. Trust the process, and soon, you’ll enjoy the understated elegance of a flawless, modern finish that whispers sophistication without a word.