To prepare your vehicle for the season, start by inspecting and replacing fluids like oil, coolant, and brake fluid, then check filters and swap out dirty ones. Examine tires and suspension for wear or damage, and test brakes for effectiveness. Review belts, hoses, and the electrical system, including the battery. Finish with a test drive to spot any issues. Keep going for detailed steps to make sure your vehicle stays reliable and safe.
Key Takeaways
- Conduct comprehensive fluid checks and replacements, including oil, coolant, brake, power steering, and transmission fluids.
- Inspect and replace filters, belts, and hoses to ensure optimal airflow, fuel delivery, and prevent leaks.
- Examine tires for wear, proper inflation, and suspension components; check brake pads, fluid, and system functionality.
- Test the electrical system, including battery health, connections, fuses, and perform a test drive to identify issues.
- Perform a final vehicle walk-around, verify all systems operate correctly, and address any detected problems before the season begins.
Inspect and Replace Fluids

Before hitting the road for the new season, it’s essential to inspect and replace your vehicle’s fluids. Start by checking the engine oil; if it’s dark or low, change it to guarantee proper lubrication and engine health. Next, examine the coolant level; low coolant can cause overheating, especially in warmer months. Don’t forget the brake fluid—if it’s dirty or has absorbed moisture, it can compromise braking performance. Also, check the power steering and transmission fluids, topping them off if necessary. Using your vehicle’s manual, verify fluid levels and service intervals. Keeping fluids fresh and at proper levels helps prevent breakdowns and extends your vehicle’s lifespan, ensuring a smooth, safe ride throughout the season. Additionally, understanding the role of fluid quality in vehicle maintenance can help you make informed decisions about when to replace or service these essential liquids.
Check and Replace Filters

After ensuring your fluids are topped off and in good condition, it’s time to focus on your vehicle’s filters. Start by inspecting the air filter; if it’s dirty or clogged, replace it to improve airflow and fuel efficiency. Check the cabin air filter as well—if it’s filled with dust or debris, swap it out to maintain air quality inside your vehicle. Don’t forget the fuel filter; if it’s overdue for replacement, it can cause fuel flow issues and engine trouble. Always follow your manufacturer’s guidelines for filter specifications and replacement intervals. Using clean filters guarantees your engine runs smoothly and your interior remains comfortable. Regularly checking and replacing filters can also help prevent engine problems and improve overall vehicle maintenance. Taking a few minutes to replace filters now can prevent more significant problems down the road.
Examine Tires and Suspension
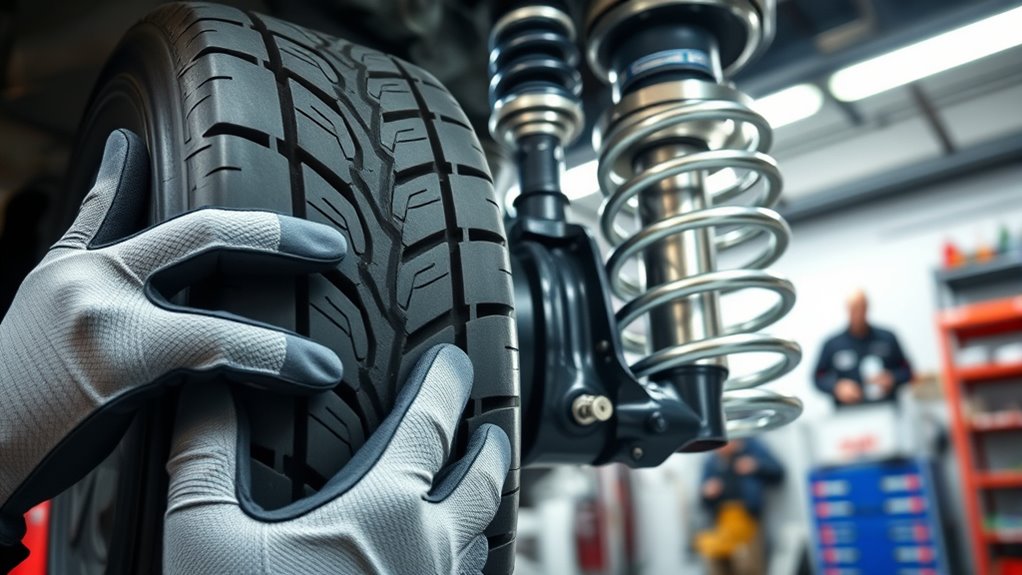
Have you checked your tires and suspension recently? Inspect your tires for uneven wear, cracks, or embedded debris that could cause issues on the road. Make certain your tires are properly inflated to the manufacturer’s recommended pressure for ideal handling and safety. Don’t forget to check the tread depth—if it’s worn down, it’s time for replacements. For your suspension, look for signs of sagging, leaks, or damaged components like shocks and struts. Test how your vehicle responds to bumps and turns; excessive bouncing or instability indicates suspension problems. Properly functioning tires and suspension improve ride comfort, handling, and safety. Additionally, understanding suspension performance metrics can help you identify issues early and ensure your vehicle’s optimal performance. Address any issues now to prevent further damage and ensure your vehicle is ready for the season ahead.
Test and Maintain Brakes

Start by inspecting your brake pads to make sure they have enough material left for safe stopping. Next, check the brake fluid level and top it off if needed, as proper fluid is essential for effective braking. Maintaining these components now helps prevent issues when you hit the road this season.
Brake Pad Inspection
Regularly inspecting and maintaining your brake pads is essential to guarantee your vehicle’s stopping power stays reliable. Start by checking the thickness of your brake pads; if they’re less than a quarter inch thick, it’s time to replace them. Look for uneven wear or deep grooves, which indicate possible issues with your braking system. Listen for squealing noises when braking, as this can signal worn pads or a need for maintenance. Visually examine the pads through the wheel spokes or remove the wheel for a clearer view. Ensure the pads move freely and aren’t sticking. Maintaining healthy brake pads not only ensures safety but also helps prevent more costly repairs down the line. Regular checks keep your stopping power sharp and your driving confident. Additionally, understanding the braking techniques used in vehicles can help you operate your brakes more effectively and safely.
Brake Fluid Check
To guarantee your braking system performs reliably, you need to check and maintain your brake fluid regularly. Start by inspecting the fluid level in the master cylinder reservoir; it should be between the minimum and maximum marks. If it’s low, top it off with the recommended brake fluid type. Next, examine the fluid’s color—healthy brake fluid is usually clear or light amber. Dark, dirty fluid indicates contamination and should be replaced. Also, check for any leaks around the brake lines and calipers. If you notice spongy brakes or increased stopping distance, it’s a sign the fluid might need flushing. Regular brake fluid maintenance ensures your braking system remains responsive and effective, keeping you safe on the road. Proper maintenance of brake components is essential for brake system safety and overall vehicle performance.
Review and Replace Belts and Hoses

Start by inspecting your belts for cracks, fraying, or glazing to spot signs of wear. Check your hoses for softness, swelling, or leaks that could lead to failure. If you notice any worn or damaged components, replace them now to avoid breakdowns later. Incorporating sound effects libraries can also help identify subtle issues during diagnostics.
Inspect Belt Condition
Inspecting the condition of your belts and hoses is essential to guarantee your vehicle runs smoothly during the season ahead. Examine your belts for cracks, fraying, or glazing, which indicate wear and the need for replacement. Feel for any looseness or excessive slack, as this can affect performance. Check hoses for leaks, bulges, or signs of deterioration like cracking or soft spots. A damaged belt or hose can lead to overheating, loss of power, or breakdowns. If you notice any issues, replace them promptly to avoid roadside failures. Remember, belts and hoses are critical components that keep your engine running efficiently. Regular inspections now can save you from costly repairs and inconvenient breakdowns later. Stay proactive and keep your vehicle in top shape.
Check Hose Flexibility
Checking the flexibility of your hoses is a key step in ensuring they won’t fail when you need them most. Grab each hose and gently squeeze or bend it. A healthy hose should feel supple, not stiff or brittle. Look for cracks, bulges, or soft spots that can indicate deterioration. If a hose feels hard or shows signs of cracking, it’s time to replace it. Don’t forget to inspect the connections for leaks or corrosion, as these can weaken the hose’s integrity. Properly flexible hoses help maintain ideal fluid flow and prevent unexpected failures. Regular inspections can prevent costly repairs and extend the lifespan of your vehicle’s components. By catching issues early, you avoid breakdowns and costly repairs down the road. Take a few minutes now to assess each hose thoroughly—your vehicle’s reliability depends on it.
Replace Worn Components
Because belts and hoses are critical for your vehicle’s operation, it’s essential to review their condition and replace any that show signs of wear. Look for cracks, fraying, glazing, or soft spots on belts, and replace them if they appear damaged. Hoses should be firm, flexible, and free of leaks or bulges; replace any that are brittle, cracked, or swollen. Worn belts can slip or break, causing engine overheating or loss of power, while damaged hoses may lead to coolant leaks or engine overheating. Additionally, inspecting fluid levels and quality can help identify potential issues before they become serious. Take the time now to inspect all belts and hoses thoroughly and swap out any suspect components. Doing so prevents breakdowns, keeps your engine running smoothly, and extends the lifespan of your vehicle.
Assess Battery and Electrical System

Before hitting the road, it’s vital to assess your vehicle’s battery and electrical system to guarantee reliable performance. Start by inspecting the battery for corrosion, loose connections, or leaks. Clean any corrosion with a mixture of baking soda and water, then tighten the terminals securely. Check the battery’s age; most batteries last about three to five years. Test the voltage with a multimeter—ideally, it should read around 12.6 volts when the engine is off. Turn on the headlights; they should be bright and steady. Examine fuses and relays for signs of damage or corrosion. If your vehicle exhibits electrical issues, like dim lights or slow starts, consider replacing the battery or having the system tested professionally to prevent unexpected breakdowns. Regular maintenance of the electrical system ensures optimal vehicle performance and longevity.
Perform a Test Drive and Final Inspection

Once you’ve completed inspecting your battery and electrical system, it’s time to take your vehicle for a test drive to guarantee everything functions smoothly. Start by driving in various conditions—city streets, highways, and stop-and-go traffic—to observe how the vehicle responds. Listen for any unusual noises, vibrations, or warning lights that may appear. Pay attention to the steering, braking, and acceleration to ensure they feel responsive and smooth. Check that all dashboard indicators are functioning properly. During the drive, test all your lights—headlights, turn signals, brake lights—to confirm they work correctly. Afterward, perform a final walk-around to inspect for leaks, loose components, or abnormal tire wear. This thorough test confirms your vehicle’s performance and reliability for the season ahead.
Frequently Asked Questions
How Often Should I Perform a Pre-Season Tune-Up?
You should perform a pre-season tune-up every year before the season starts. This helps guarantee your equipment is in top condition and ready for ideal performance. If you’re actively using your gear or playing regularly, consider doing minor checks mid-season. Regular maintenance keeps your equipment reliable, reduces the risk of injury, and maximizes your gameplay. Don’t wait too long—get it done annually to stay ahead of any issues.
Are There Specific Tools Needed for This Maintenance?
Yes, you’ll need specific tools for maintenance. Grab a set of skate wrenches to tighten edges, a bevel guide to check blade angles, and a sharpening stone or file for edge touch-ups. A towel and cleaning solution help keep your equipment in top shape. Having these tools on hand guarantees you can perform thorough tune-ups quickly, keeping your skates sharp, safe, and ready for the season.
Can I Do This Tune-Up Myself or Should I Hire a Professional?
You can definitely do this tune-up yourself if you’re comfortable with basic maintenance tasks and have the right tools. However, if you’re unsure about any procedures or lack experience, hiring a professional is a smart choice to make sure everything gets done correctly and safely. Consider your skill level, available time, and comfort with tools before deciding—sometimes investing in expert help saves you time and prevents potential mistakes.
What Signs Indicate My Car Needs Urgent Maintenance?
If your car makes strange noises, has difficulty starting, or the check engine light stays on, you need urgent maintenance. Also, watch for fluid leaks, strange smells, or decreased braking performance. If your steering feels off or you notice unusual vibrations, don’t delay—these are signs something’s wrong. Address these issues quickly to prevent further damage and ensure your safety on the road.
How Long Does a Complete Pre-Season Tune-Up Typically Take?
A complete pre-season tune-up usually takes about two to four hours. While that might sound like a quick fix, it’s your safeguard against unexpected breakdowns and costly repairs. Imagine hitting the road confident, knowing your car’s in top shape. Rushing through it could leave you stranded. So, take the time needed—your safety and peace of mind are worth every minute.
Conclusion
By giving your vehicle this gentle tune-up, you’re setting the stage for smoother journeys ahead. A little extra care now can help you avoid unexpected surprises down the road, turning potential hiccups into seamless rides. Think of it as tending a garden—you nurture what’s important, ensuring everything remains in harmony. With these simple steps, you’ll keep your car humming happily, ready to take on whatever adventures come your way.