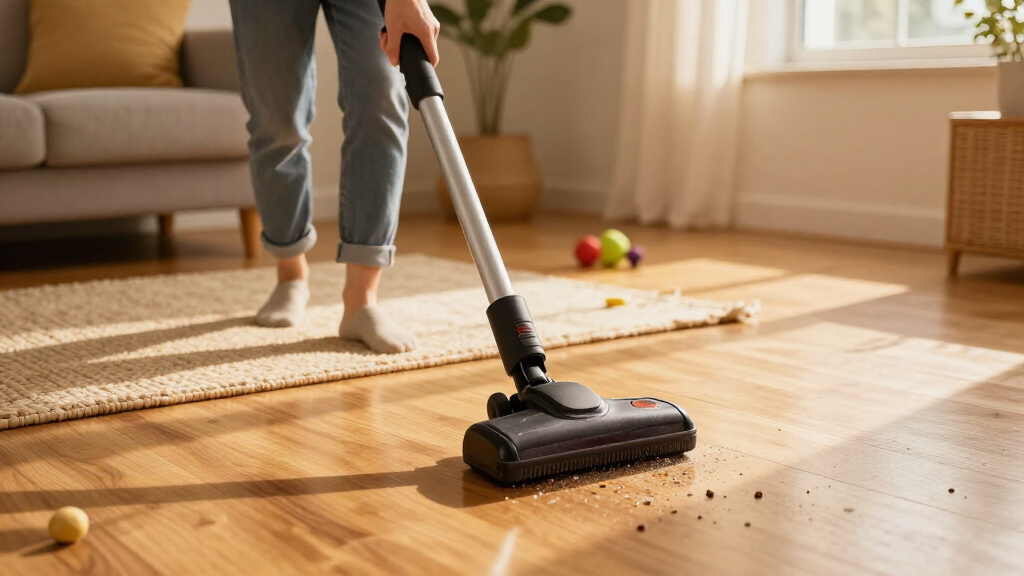
This guide helps you choose a cordless stick vacuum for your home, assemble and charge it, clean floors and furnishings, and maintain it so it keeps working well. It is for first-time buyers and owners who want practical steps without needing repair experience. Allow 30-60 minutes to compare options and set up a new vacuum; cleaning time depends on your home and the battery’s runtime.

Get cleaning gear delivered free with Prime
- Fast, free delivery on millions of items
- Prime Video, Amazon Music and more included
- Member-only deals all year

Shark Pet Cordless Stick Vacuum, IX141
- ✔ Model: IX141
- ✔ Type: Cordless stick vacuum with handheld conversion
- ✔ Runtime: Up to 40 minutes in handheld standard mode
KARDV Cordless Stick Vacuum Cleaner, 500W, 40 kPa, 60-Minute Runtime
- ✔ Motor power: 500W
- ✔ Maximum suction: 40 kPa
- ✔ Runtime: Up to 60 minutes minimum mode; 20–25 minutes maximum mode

TechRise Cordless Stick Vacuum Cleaner, 650W
- ✔ Motor: 650W brushless motor
- ✔ Maximum stated suction: Up to 55 kPa
- ✔ Runtime: Up to 70 minutes on low mode under no-load test conditions
Difficulty: Beginner | Time: 30-60 minutes to choose and set up; 10-30 minutes per cleaning session
What You’ll Need
Tools & Materials:
- The vacuum’s user manual and included attachments
- A compatible charger or charging dock
- A clear wall outlet near a dry storage location
- Scissors or a seam ripper for carefully removing hair from the brush roll, if permitted by the manual
- A soft, dry cloth
Knowledge:
- Basic ability to compare product specifications and prices
- Ability to identify hard floors, rugs, and delicate surfaces in your home
- No vacuum repair experience is required
Check the manufacturer’s instructions for assembly, charging, filter washing, and attachment compatibility. Models vary: do not wash a filter unless the manual says it is washable, and do not use a wet vacuum on liquids unless it is designed for that purpose. If you are buying, first note your floor types, approximate home size, storage space, and whether anyone has long hair or allergies.
Shark Pet Cordless Stick Vacuum, IX141
The Shark IX141 earns our top spot because it combines the most clearly defined everyday jobs: cleaning carpets and hard floors, then converting into a handheld for stairs, furniture, or tight spaces. Its bristle brushroll and HyperVelocity suction are paired with a Pet Multi-Tool, giving pet owners a dedicated accessory rather than asking them to make do with a general-purpose nozzle. Compared with KARDV’s broader 8-in-1 accessory set, Shark’s kit is less expansive on paper, but its pet-focused tool makes the intended use more specific.The key qualification is runtime. Shark lists up to 40 minutes in standard mode at the handheld vacuum, so we should not interpret that as 40 minutes of continuous stick-vacuuming across floors. KARDV and TechRise provide longer low-mode claims, although both also attach meaningful conditions to those figures. Shark’s XL removable dust cup, CleanTouch Dirt Ejector, and LED headlights round out a practical package, while freestanding storage may be useful when a wall mount is inconvenient. Its main limitation versus the other two is less stated bin capacity detail and no equivalent long low-mode headline figure. Choose it for the most balanced, pet-aware feature set, not for maximum-runtime claims.
Pros:
- Designed for carpets, rugs, and hard floors
- Converts to a handheld for stairs, furniture, and confined areas
- Includes a Pet Multi-Tool and a Crevice Tool
- XL removable dust cup, LED headlights, and CleanTouch Dirt Ejector
Cons:
- Up-to-40-minute runtime is measured in handheld standard mode, not specified as stick-mode runtime
- Dust-cup capacity is described as XL without a volume measurement
- The listed accessories are less extensive than KARDV’s 8-in-1 set
Best for: Households that clean both carpet and hard floors and want a handheld conversion plus a dedicated tool for pet hair.
Not ideal for: Buyers who need a clearly specified long floor-cleaning runtime, a measured dust-cup volume, or an especially broad accessory bundle.
Bottom line: We recommend the Shark IX141 as the strongest all-rounder here for mixed floors and pet-hair tasks, provided buyers understand its runtime qualification.
“We recommend the Shark IX141 as the strongest all-rounder here for mixed floors and pet-hair tasks, provided buyers understand its runtime qualification.”
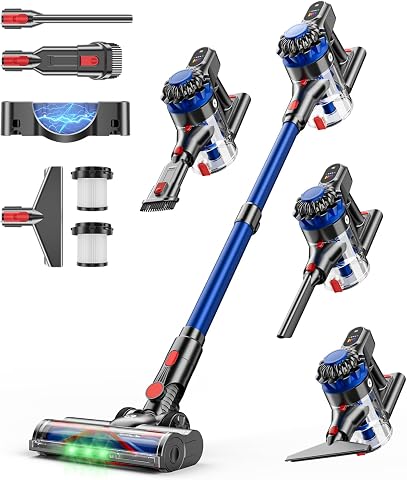
KARDV Cordless Stick Vacuum Cleaner, 500W, 40 kPa, 60-Minute Runtime
Where Shark is the more defined all-rounder, the KARDV cordless stick vacuum is better suited to buyers who value a large bin and a broad set of cleaning tools. Its 1.5-liter dust cup may mean fewer interruptions to empty during a session than a smaller-capacity design, and the supplied 8-in-1 accessories are intended to cover floors, furniture, and car interiors. That makes KARDV the most flexible-looking kit in this comparison, although the exact tools included should matter more to a buyer than the accessory count alone.Its runtime is presented with useful mode distinctions: up to 60 minutes in minimum mode, but 20–25 minutes in maximum mode. That shorter high-power window is the figure to keep in mind for demanding jobs; the long claim is best understood as an efficiency-oriented setting, not a guarantee of extended maximum suction. Compared with TechRise, KARDV provides a lower stated low-mode maximum but also specifies its maximum-mode runtime. Its 500W motor, stated 40 kPa suction, anti-tangle brush, LED display, wall-mounted charging, and one-touch bin emptying create a feature-rich proposition. The tradeoff is that the supplied information does not establish how the suction or filtration claims translate to performance on particular debris or floors. Choose it for capacity and task coverage, not simply because the runtime headline is high.
Pros:
- Large 1.5-liter dust cup with one-touch emptying
- 8-in-1 accessories support floors, furniture, and car cleaning
- Anti-tangle floor brush with LED lighting
- Runtime is stated separately for minimum and maximum modes
Cons:
- Maximum-mode runtime is listed as only 20–25 minutes
- The 60-minute figure applies to minimum mode
- The accessory count does not by itself clarify which tools are most useful for each task
Best for: Buyers who want a larger dust cup, useful tools for several surfaces and car interiors, and mode-specific runtime information.
Not ideal for: People who expect to use maximum suction for long uninterrupted sessions or prefer a simple, minimal accessory setup.
Bottom line: KARDV is our capacity-and-accessory pick for buyers who can work within its shorter maximum-mode runtime.
“KARDV is our capacity-and-accessory pick for buyers who can work within its shorter maximum-mode runtime.”
TechRise Cordless Stick Vacuum Cleaner, 650W
The TechRise 650W stands out for shoppers who want a self-standing stick vacuum with adjustable reach and a long stated low-mode runtime. Its headline is up to 70 minutes on low mode, longer than KARDV’s 60-minute minimum-mode claim and Shark’s 40-minute handheld-mode figure. But TechRise specifies that its result comes from low suction under no-load test conditions. We therefore treat it as an optimistic reference point, not a reliable estimate of a full cleaning session with the floor brush doing work.A self-standing adjustable tube may make pauses and storage more convenient than a design that needs to be leaned against furniture or put on a wall mount. Its 1.8-liter dust cup is the largest stated capacity in this group, while the anti-tangle floor brush, green LED lights, HEPA filter, and attachments cover a range of household tasks. Compared with KARDV, it adds the self-standing format and a longer qualified low-mode claim; compared with Shark, it offers more capacity detail but lacks Shark’s specifically named Pet Multi-Tool. Buyers should also account for upkeep: the product information calls for regular cleaning of the filter, tube, and brush roller. This is a promising fit for longer, lower-intensity cleaning and flexible storage, but less compelling for anyone choosing solely by its maximum suction or runtime headline.
Pros:
- Up to 70 minutes stated on low mode under no-load test conditions
- Self-standing design and adjustable tube
- 1.8-liter dust cup, the largest stated capacity in this lineup
- Anti-tangle brush, green LED lights, HEPA filter, and task attachments
Cons:
- The runtime claim is for low suction under no-load conditions
- Filter, tube, and brush roller require regular cleaning
- No dedicated pet-hair tool is specified in the supplied details
Best for: People who prefer a self-standing vacuum, adjustable tube, large stated dust cup, and extended low-mode cleaning for lighter jobs.
Not ideal for: Buyers who need a substantiated runtime under powered floor-cleaning conditions, minimal maintenance, or a dedicated pet-hair tool.
Bottom line: TechRise is the most compelling fit for capacity and convenient self-standing storage, as long as its qualified runtime and maintenance demands suit the buyer.
“TechRise is the most compelling fit for capacity and convenient self-standing storage, as long as its qualified runtime and maintenance demands suit the buyer.”
As an Amazon Associate we earn from qualifying purchases.
Before You Start
Unpack the vacuum on a stable surface and keep small accessories together. Check the product label and manual for the correct charger and battery handling instructions. Do not use a damaged battery, cable, charger, or vacuum. For a new purchase, compare real cleaning needs rather than relying on advertised maximum runtime: powered floor heads, high suction settings, and a worn battery can shorten cleaning time. If the battery is removable, use only a model-approved replacement.
Step-by-Step Instructions
Step 1: Match the vacuum to your home
List the surfaces you clean: hard flooring, low-pile rugs, thick carpet, stairs, and upholstery. Choose a model whose floor head is approved for those surfaces and whose powered brush can be switched off or adjusted when needed. Check the manufacturer’s stated runtime at the settings you expect to use, battery charging time, dust-bin capacity, weight, and warranty. If you clean a large area, check whether the battery is replaceable and whether a compatible spare is available. For pet hair or long hair, look for a brush roll designed to resist tangles and confirm that it can be accessed for cleaning.
Tip:Runtime figures often refer to a low-power setting without a powered floor head. Compare like-for-like operating modes rather than treating the maximum figure as a guaranteed whole-home cleaning time.
Check: You can identify the floors the vacuum supports, the mode you plan to use, and whether its runtime, weight, storage, and bin capacity suit your cleaning routine.
Step 2: Inspect and assemble the vacuum
Check the body, wand, floor head, battery, charger, and accessories for damage or missing parts. Assemble the wand and floor head in the order shown in the manual, pressing each connector in until it locks. Fit the battery only as instructed, then attach an accessory and remove it once to confirm that the release mechanism works. Do not force a connector that does not line up; check its orientation and remove any packaging material blocking it.
Tip:Keep the manual and accessory guide where you store the vacuum. Some attachments fit only on the wand or only on the handheld body.
Check: The wand and head stay attached when gently pulled, the battery sits securely, and the controls and attachment releases operate without force.
Step 3: Charge the battery and prepare storage
Place the vacuum or battery on its approved charger or dock, using the setup instructions for your model. Plug the charger into a suitable indoor outlet and check the indicator to confirm that charging has started. Charge for the time specified in the manual before the first full cleaning session. Store the charger where the vacuum can sit securely, away from water, heat sources, and walkways. Do not cover the charger or charge a battery that is swollen, leaking, unusually hot, or damaged.
Tip:Charging lights differ between models. Use the manual to interpret the indicator instead of assuming that a blinking light means the battery is fully charged.
Check: The indicator shows the expected charging state, and the vacuum is stable on its dock or charger without straining the cable.
Step 4: Clear floors and select the correct setting
Pick up large objects, cords, and anything that could block the brush roll or damage the vacuum. Check the floor head for loose threads or debris left from testing. Choose the hard-floor, rug, or carpet setting recommended by the manual. Switch off the rotating brush for delicate rugs or surfaces if the instructions call for it. Keep the vacuum away from liquids, hot ash, sharp objects, and fine construction dust unless the manufacturer specifically approves those materials.
Tip:Test an unfamiliar setting on a small, inconspicuous area first. Stop if the head pulls at a rug or the surface appears to scratch or shed.
Check: The route is clear, the floor head suits the surface, and the vacuum runs without grabbing cords, rug edges, or loose items.
Step 5: Vacuum in deliberate passes
Turn on the vacuum using the setting recommended for the floor. Move the head slowly in overlapping passes so suction has time to lift dirt. Use a lower setting for routine cleaning when it works well; switch to a stronger setting only where extra pickup is needed. Lift or redirect the head when moving between floor types, and do not force it under furniture or over a threshold if it catches. For stairs or upholstery, detach the wand or head as directed and use the appropriate tool, keeping a firm grip on the handheld unit.
Tip:If the brush stops or the vacuum makes an unusual sound, switch it off before checking for a blockage. Do not reach into a powered floor head.
Check: Debris is collected in the bin, the head moves smoothly, and the vacuum does not leave visible dirt trails or damage the floor or rug.
Step 6: Empty the bin and check for blockages
Switch off the vacuum and remove it from the charger before maintenance. Hold the bin over a rubbish container and open its release as directed, keeping fingers clear of the mechanism. Empty the contents and close the bin until it latches. If suction dropped, check the inlet, wand, and floor head for obstructions according to the manual. Remove visible hair from the brush roll only when the vacuum is off, and use the designated access points or tool. Avoid pulling on wires, cutting near bristles, or dismantling sealed parts.
Tip:Empty the bin before it reaches its fill line. A packed bin can reduce airflow and make dirt spill when the lid opens.
Check: The bin is empty and latched, airflow paths are clear of visible obstructions, and the brush roll turns freely when checked as instructed.
Step 7: Clean filters and recharge as directed
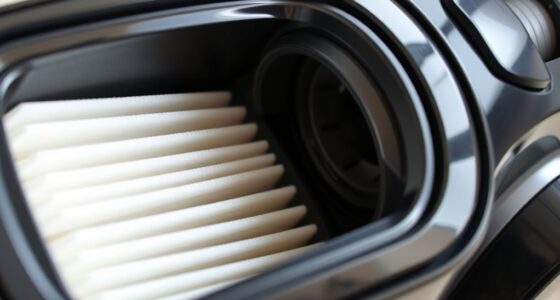
Check the manual for the filter type and cleaning schedule. Remove filters only in the way shown. If a filter is washable, rinse and dry it for the full period specified by the manufacturer before reinstalling; never put a damp filter back into the vacuum. Tap a non-washable filter gently over a rubbish container only if the manual permits it. Wipe exterior surfaces with a dry or manufacturer-approved cloth. Return the vacuum to its charger and check the indicator before the next cleaning session.
Tip:Washing a non-washable filter or running the vacuum with a wet filter can damage the motor. Do not use cleaning chemicals unless the manual approves them.
Check: The filter is correctly seated and fully dry if washed, exterior surfaces are clean, and the charging indicator shows the expected state.
Common Mistakes to Avoid
- Choosing a model based only on its advertised maximum runtime. — Check runtime for the powered floor head and suction mode you will actually use, then compare it with the area you need to clean.
- Using a rotating brush on a delicate rug or floor. — Follow the surface guidance in the manual, switch off or adjust the brush when directed, and test an inconspicuous area.
- Reinstalling a filter before it is completely dry. — Wash filters only when the manual permits it and allow the full stated drying time before putting them back.
- Letting the bin fill completely or ignoring hair on the brush roll. — Empty the bin at or before its fill line and check the brush roll regularly with the vacuum switched off.
Troubleshooting
Problem: The vacuum will not turn on.
Solution:
Check that the battery is seated, charged, and compatible with the model. Inspect the charger and outlet, and look for a battery or temperature warning in the manual. Let an overheated unit cool as instructed. If the battery or charger is damaged, stop using it and contact the manufacturer or an authorized service provider.
Problem: Suction is weak or dirt remains on the floor.
Solution:
Switch off the vacuum, empty the bin, and inspect the inlet, wand, head, and filters for a blockage or incorrect fit. Clean or replace filters only as the manual directs. Confirm that the selected mode suits the surface and that the brush roll is not tangled. If suction remains weak, contact the manufacturer rather than opening sealed motor parts.
Problem: The brush roll stops, or the head is difficult to push.
Solution:
Turn off the vacuum and check for hair, string, or a trapped rug edge. Remove an obstruction through the intended access point, then check that the brush cover and head are fitted correctly. If the brush still stops, check the manual for a jam warning or service procedure; do not operate the head while clearing it.
Problem: The battery runs down before the cleaning is finished.
Solution:
Use the lowest effective suction setting, clean the filter and brush roll as directed, and split the job into smaller sessions. Compare your measured runtime with the model’s specifications. If runtime has fallen substantially after correct charging and maintenance, ask the manufacturer about battery testing or an approved replacement.
What Success Looks Like
The vacuum is assembled securely, charges as indicated, and collects visible debris from compatible floors without catching or causing damage. The dust bin empties and latches correctly, airflow paths and brush roll are free of visible obstructions, and any washed filter is fully dry before use. You can identify the appropriate setting for each surface and know how to check the manual for maintenance and warnings.
Next Steps
After each cleaning session, empty the bin when needed, remove visible hair from the brush roll with the vacuum switched off, and return the unit to its approved charging location. Follow the manual’s schedule for filter checks and replacements, and inspect the charger, battery, and floor head for damage. Keep attachments together and note any persistent loss of suction, unusual heat, odor, or noise. Stop using the vacuum if a battery or electrical part appears damaged, and contact the manufacturer or an authorized service provider.
Frequently Asked Questions
Can I use a cordless stick vacuum on both hard floors and carpets?
Many models can clean both, but head design and settings differ. Check the manual and product specifications for your carpet type; adjust suction or switch the brush roll as directed.
How often should I empty the dust bin?
Empty it when it reaches the marked fill line, or sooner if suction drops or debris blocks the inlet. Some small bins need emptying during a single cleaning session.
Can I leave the vacuum on its charging dock?
Follow the instructions for your battery and model. Many are designed for dock storage, but charging guidance can differ, particularly for removable batteries. Keep the dock dry and use the supplied or approved charger.
How do I know whether the filter can be washed?
Check the filter label and user manual. Wash it only if the manufacturer explicitly permits washing, and reinstall it only after it has dried for the full stated period.
What should I do if the vacuum smells hot or makes an unusual noise?
Switch it off and unplug or remove it from the charger. Check for a blockage only after it has stopped, and consult the manual. If the smell or noise continues, or the battery becomes unusually hot, stop using the vacuum and contact the manufacturer.
Columbus Day / Indigenous Peoples' Day Picks
long weekend sales
As an affiliate, we earn on qualifying purchases.