To prevent your robot vacuum from getting stuck, clear clutter, loose rugs, and cords from its paths. Secure wires along walls and keep changes smooth with ramps or boundary strips. Regularly clean sensors and bumpers to make sure they work properly. Create designated cleaning zones and remove obstacles in high-traffic areas. Staying on top of home prep boosts efficiency, and you’ll discover more tips to keep your vacuum running smoothly with minimal hassle.
Key Takeaways
- Clear clutter, small objects, and loose cords to prevent blockages and tangles during vacuuming.
- Secure and organize cables with clips or ties, keeping them flat and out of the vacuum’s path.
- Manage rugs by trimming edges, flattening curls, and using boundary strips or low-profile pads for smooth navigation.
- Regularly inspect and clean sensors and bumpers to ensure accurate obstacle detection and responsiveness.
- Use physical barriers or designated zones to create clear cleaning areas, reducing wandering and getting stuck.
Clearing Clutter and Obstructions
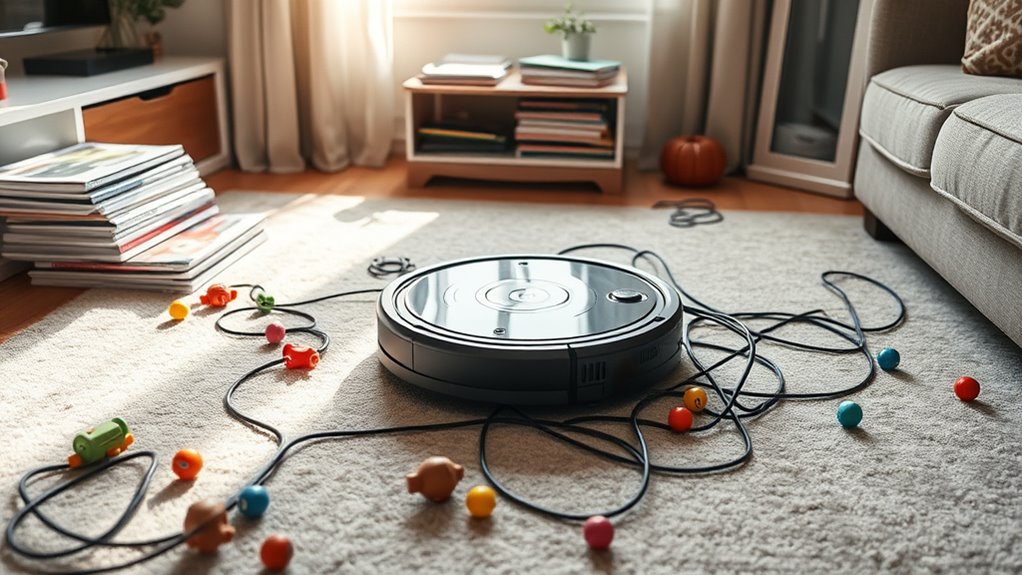
Before you run your robot vacuum, it’s essential to clear away any clutter and obstructions that could hinder its performance. Small objects like shoes, toys, or clothing can block the vacuum’s path or cause it to get stuck. Remove loose rugs or remove any thin cords that might get tangled in the brushes. Clear off tabletops or counters so the vacuum doesn’t bump into fragile items. Pay attention to areas with cluttered corners or tight spaces, as debris there can trap the vacuum. Ensuring the floor is free of obstacles allows your robot vacuum to move smoothly and clean effectively. Taking a few minutes to tidy up before starting saves you time and prevents frustrating interruptions during the cleaning cycle. Regularly checking for obstacle detection can also help prevent unexpected obstructions. Additionally, inspecting the wicking materials in your self-watering planters can prevent leaks or overflows that might interfere with your home’s cleanliness. Keeping the floor surface clear of dust and debris can further enhance the vacuum’s efficiency and longevity. Incorporating professional services for complex home setups can further streamline your cleaning routines and maintenance needs.
Securing Cables and Wires
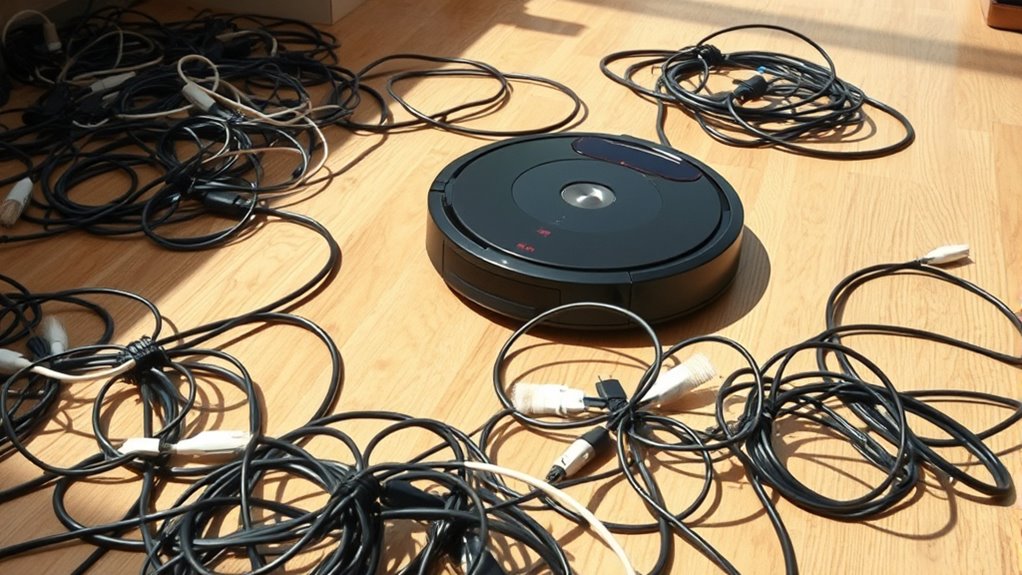
To prevent cables and wires from tangling or getting caught in your robot vacuum, it’s important to secure them properly. Start by unplugging devices and gathering cords out of the way. Use cable clips or adhesive hooks to keep wires along walls or furniture edges, reducing loose slack. Avoid leaving long, dangling cords in open areas where the vacuum might snag them. If you have multiple wires, bundle them together with twist ties or Velcro straps to prevent individual strands from sticking out. Make sure cords are flat on the floor, not twisted or bunched up. Regularly check and adjust the placement of cables before each cleaning session. Additionally, content discoverability can be improved by organizing cables with labeled tags, making it easier to identify and manage them during cleaning. This simple step minimizes the risk of jams and saves you from having to manually clear your vacuum.
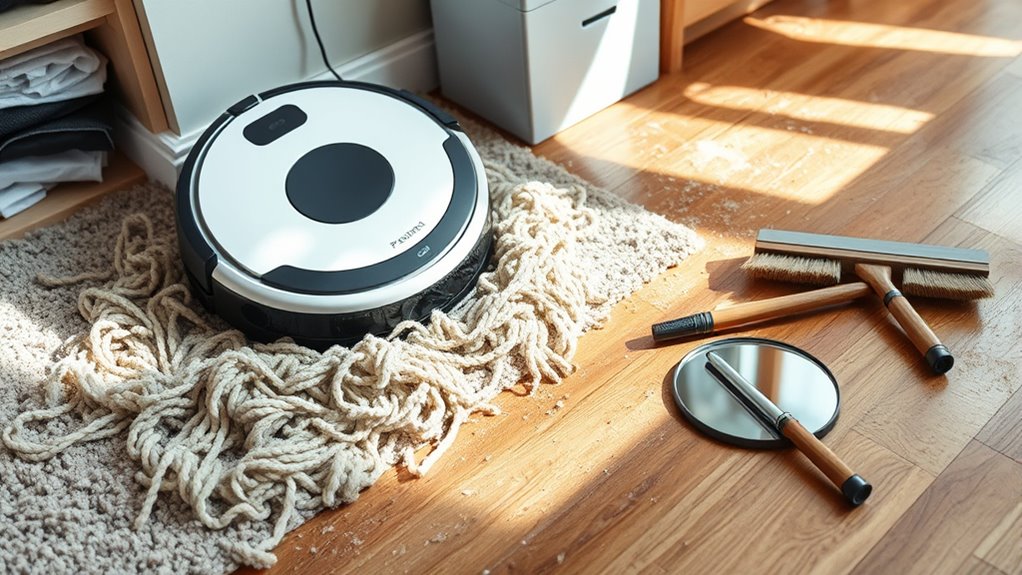
Managing Rugs and Floor Transitions

Managing rugs and floor crossings is key to ensuring your robot vacuum works smoothly. You’ll want to think about rug edges and thickness to prevent jams, while seamless movements help the vacuum move effortlessly between surfaces. Addressing these points keeps your cleaning efficient and hassle-free. Using the right floor surface compatibility can also improve your audio experience when setting up or troubleshooting your devices. Additionally, paying attention to rug placement and edges helps prevent the vacuum from getting caught or stuck on uneven or thick areas, ensuring a smoother cleaning process. Understanding material and thickness variations can further optimize your vacuum’s navigation and performance.
Rug Edges and Thickness
Rug edges and thickness can considerably impact how well your robot vacuum navigates your space. Thick rugs with fringes or tassels may cause the vacuum to get stuck or struggle to clean thoroughly. Edges that curl up or are uneven can trap the vacuum’s sensors, making it think it’s bumping into a wall when it’s not. To improve navigation, trim loose fringes and flatten curled edges before cleaning. For thicker rugs, consider using a virtual wall or boundary strip to prevent the vacuum from attempting to cross overly plush areas. If your vacuum has adjustable height settings or sensors, optimize these to handle thicker surfaces better. Properly managing rug edges and thickness reduces the chances of jams and ensures your robot cleans efficiently. Additionally, understanding automation in business can provide insights into how technological advancements are improving device functionality and user experience. Recognizing technology integration can further enhance your understanding of how smart home devices adapt to various environments, leading to more effective cleaning routines. Staying informed about new robot vacuum features can help you select the best tools for your specific flooring types. Moreover, exploring support hours for assistance can help troubleshoot issues more effectively when problems arise. Keeping up with remote updates from manufacturers can also ensure your vacuum operates with the latest improvements and fixes.
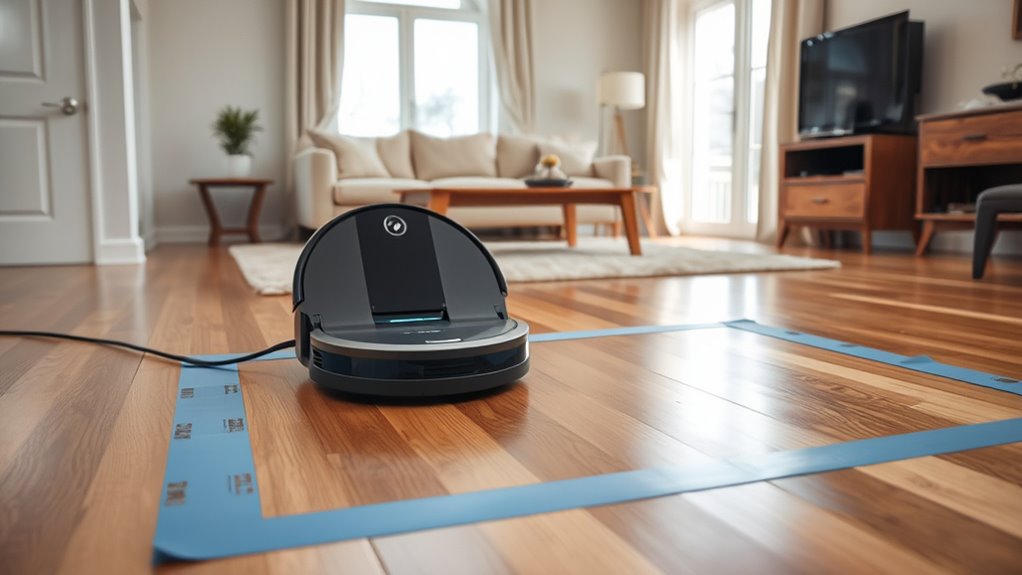
Seamless Floor Transitions
Seamless floor passageways are essential for preventing your robot vacuum from getting stuck or missing areas during cleaning. To achieve this, guarantee transitions between different flooring types are smooth. If you have rugs or carpets, use a low-profile rug pad to prevent the vacuum from catching on thick edges. Consider installing transition strips or ramps where floors meet, especially on uneven surfaces or thresholds. Keep these areas clear of clutter and loose cords that could obstruct movement. Adjust the robot’s height settings if your device allows, so it can navigate over small height differences effortlessly. Regularly inspect these transitions for wear or debris, and tighten or replace strips as needed. Properly managing floor transitions helps your robot clean more efficiently without interruption. Incorporating flooring transition solutions can further enhance navigation and reduce the risk of getting stuck.
Checking and Updating Sensors and Bumpers
Start by inspecting your robot’s sensors to make sure they’re properly aligned and free of dust or debris. Next, test the bumpers to confirm they respond correctly when pressed or triggered. Keeping these components in top shape helps your vacuum navigate smoothly and avoid obstacles effectively.
Sensor Alignment Checks
To guarantee your robot vacuum navigates accurately, it’s essential to regularly check and update its sensors and bumpers. Start by inspecting the sensors for dust, dirt, or debris that may obstruct their view. Gently wipe them with a soft, dry cloth to ensure clear signals. Next, verify that sensors are properly aligned; they should face forward and be unobstructed. If any sensors appear misaligned or loose, carefully adjust or secure them. Check the bumpers for proper contact and alignment, ensuring they sit flush and aren’t bent or damaged. Misaligned sensors can cause your vacuum to misjudge obstacles, leading to frequent getting stuck. Regularly maintaining sensor alignment keeps your vacuum’s navigation precise, which is essential for effective cleaning, ensuring optimal performance and preventing future issues. Proper calibration of sensors and bumpers can also help mitigate cybersecurity vulnerabilities that may compromise your device’s operation.
Bumper Function Testing
Proper bumper function is essential for your robot vacuum to detect and respond to obstacles effectively. If your vacuum gets stuck or bumps into things repeatedly, it’s time to check its bumpers. Here are four key steps:
- Inspect the bumper for dirt, debris, or damage that could impair movement.
- Test the bumper’s responsiveness by gently pressing it to see if it triggers the sensor.
- Clean the bumper and surrounding sensors using a soft cloth and mild cleaner.
- Update the firmware or recalibrate the bumper sensors if your device offers that option.
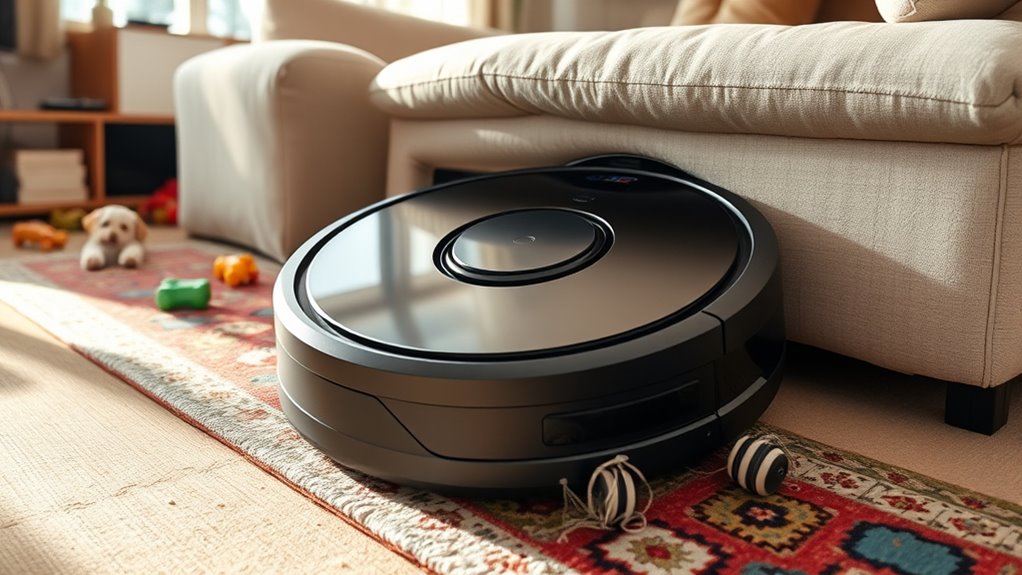
Creating a Defined Cleaning Area
Creating a defined cleaning area helps your robot vacuum focus on high-traffic or cluttered spots, guaranteeing thorough cleaning without wasting time. Use physical barriers like rugs, furniture, or magnetic strips to block off areas where you don’t want the vacuum to go. Label or mark zones that need frequent attention, such as kitchens or entryways, so your vacuum can prioritize these spaces. Clear clutter and move small objects that could obstruct its path within these zones. Creating boundaries prevents the vacuum from wandering into areas where it might get stuck or where cleaning isn’t necessary. This targeted approach saves battery life, reduces cleaning time, and assures your high-traffic zones stay spotless. Properly defining cleaning areas helps your robot work more efficiently and minimizes frustration.
Regular Maintenance and Floor Inspection
Regular maintenance and floor inspection are essential to keep your robot vacuum performing at its best. By regularly checking and caring for your device, you can prevent many common issues, including getting stuck. Here are four key steps to keep your floors and vacuum in top shape:
- Clear debris and hair from brushes and wheels.
- Inspect sensors and clean them gently with a soft cloth.
- Check for and repair any damage to the vacuum’s body or brushes.
- Sweep or vacuum the floor before your robot runs, especially in high-traffic areas.
- Staying aware of industry trends can help you adapt your maintenance routine for optimal performance.
- Incorporating preventative measures, such as using butter-inspired color cues in your home decor, can improve visual navigation cues for your device.
Staying proactive with these routines guarantees your vacuum navigates smoothly, reduces downtime, and extends its lifespan. Regular upkeep saves you hours of troubleshooting and keeps your floors consistently clean.
Frequently Asked Questions
How Often Should I Replace the Robot Vacuum’s Filters?
You should replace your robot vacuum’s filters every 2 to 3 months for peak performance. If you notice reduced suction or your vacuum isn’t cleaning as effectively, it might be time sooner. Check the manufacturer’s guidelines, as some filters are washable and reusable, while others need replacing. Regularly inspecting and replacing filters ensures your vacuum runs efficiently, saving you time and maintaining a cleaner home.
Can I Program My Robot Vacuum for Specific Cleaning Schedules?
Yes, you can program your robot vacuum for specific cleaning schedules. Most models come with a scheduling feature that lets you set cleaning times to fit your routine. Simply access the device’s app or control panel, select your preferred days and times, and save your settings. This way, your vacuum automatically cleans when you want, saving you time and effort without manual intervention.
What’s the Best Way to Troubleshoot if My Vacuum Won’t Start?
If your vacuum refuses to start, don’t panic — it’s probably just shy. First, check if it’s properly charged or plugged in. Then, clear any debris from sensors and brushes; sometimes they get overwhelmed. Reset the device if possible, and ensure no obstacles block its path. Ironically, a quick home prep like removing tangled hair can save hours of frustration and get your vacuum moving smoothly again.
Do Different Floor Types Require Different Cleaning Settings?
Yes, different floor types often need different cleaning settings. For example, hardwood floors typically require lower suction power to prevent damage, while carpets need higher suction to pick up dirt effectively. You should modify your robot vacuum’s settings based on the surface it’s cleaning. Many models allow you to customize cleaning modes, so take a moment to select the appropriate one. Doing this ensures efficient cleaning and helps your vacuum avoid getting stuck or causing damage.
How Can I Extend the Lifespan of My Robot Vacuum?
Think of your robot vacuum as a trusty car; regular maintenance keeps it running smoothly. To extend its lifespan, clean the brushes and filters weekly, check for tangled hair or debris, and replace parts as needed. Avoid overworking it by setting boundaries for daily use and make certain your floors are clear of obstacles. Proper care now means fewer breakdowns later and a longer, more efficient cleaning partner.
Conclusion
By taking these simple steps, you’re giving your robot vacuum a clear path, like a well-marked trail through a dense forest. Keep clutter in check, secure cables, and maintain sensors regularly, and your vacuum will glide smoothly, saving you hours of frustration. Think of it as tuning a fine instrument—when everything’s in harmony, cleaning becomes effortless. With a little prep, you’ll turn your robot into a tireless helper rather than a stuck obstacle.