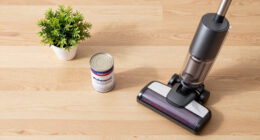

To prevent leaks with your countertop dishwasher, focus on proper setup. Guarantee water supply hoses are securely connected without over-tightening, and check seals and gaskets for cracks or wear. Level the unit correctly and install the drain hose at a slight downward angle. Avoid common mistakes like loose fittings or improper positioning, which can cause water damage. Keep an eye on these setup traps, and you’ll find how to keep your dishwasher leak-free through upcoming tips.
Key Takeaways
- Improper water supply connections and loose fittings are common setup traps that cause leaks in countertop dishwashers.
- Over-tightening seals, gaskets, or fittings can crack components and lead to water leaks.
- Incorrect drain hose installation, such as sharp bends or improper angles, disrupts drainage and causes leaks.
- Failing to level the dishwasher properly can result in water pooling and leakage during operation.
- Neglecting regular inspection and maintenance of hoses, seals, and connections increases the risk of setup-related leaks.

Eastman 5 Ft. Dishwasher Installation Kit, Braided Stainless Steel Supply Line with 3/8 Inch Compression Ends, 41041
- Supply Line Length: 5 ft. braided stainless steel
- Connection Ends: 3/8 in. compression fittings
- Included Components: Elbows and supply line
As an affiliate, we earn on qualifying purchases.
As an affiliate, we earn on qualifying purchases.
How to Properly Set Up Your Countertop Dishwasher to Prevent Leaks
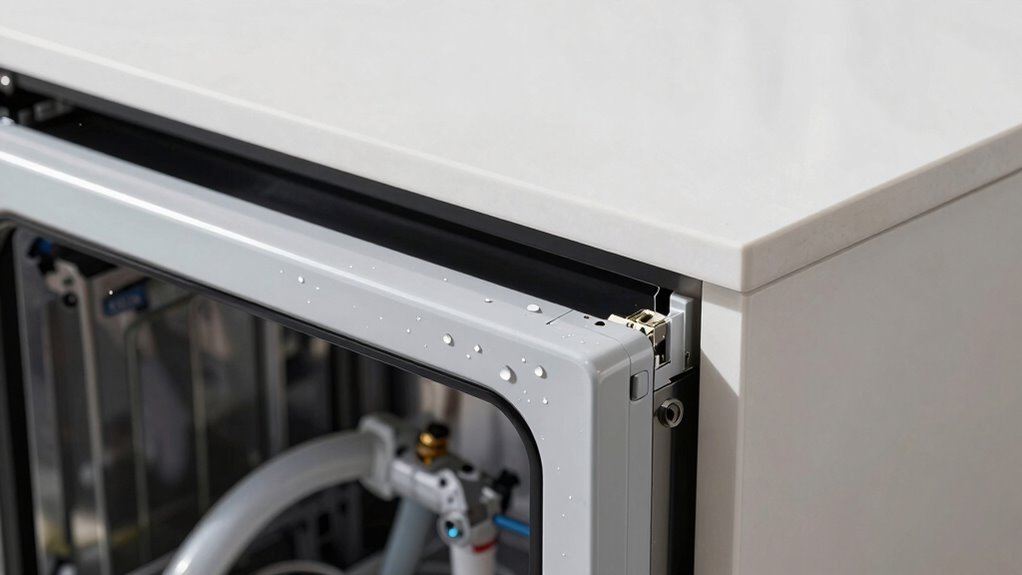
To prevent leaks, ensuring proper setup of your countertop dishwasher correctly from the start is essential. Start by checking the water supply connection, making sure the hose is tightly secured and free of kinks. Proper dishwasher maintenance includes inspecting the inlet valve and filter for debris that could disrupt water flow. Maintaining correct water pressure is critical; too high pressure can cause leaks, while too low might prevent proper washing. Use a pressure regulator if necessary. Always follow the manufacturer’s instructions when installing the unit, and double-check all connections before powering it on. Regularly inspecting your setup ensures that water flows smoothly, reducing the risk of leaks caused by improper setup or inconsistent water pressure. Additionally, understanding balancing support and boundaries in your setup can help prevent over-tightening or loosening of connections, which might lead to leaks. Being aware of water pressure management techniques can further safeguard your appliance from potential water damage. Proper installation techniques are vital for long-term leak prevention and overall appliance performance. Ensuring that all components are correctly aligned and securely fastened can make a significant difference in preventing leaks. Moreover, consulting a professional for complex installations can help ensure that installation safety standards are met, minimizing the risk of future issues.

Pushglossy 2 Pcs Dishwasher Door Seal Compatible with WD08X21894 Ge Dishwasher Parts Plastic Door Gasket Replaces Replacement Part, 22 Inch
- Complete Door Seal Kit: Includes 2 x 22-inch gaskets for long-term use
- Universal Compatibility: Replaces multiple GE and Hotpoint models
- Durable Material Construction: Made from plastic and rubber for reliability
As an affiliate, we earn on qualifying purchases.
As an affiliate, we earn on qualifying purchases.
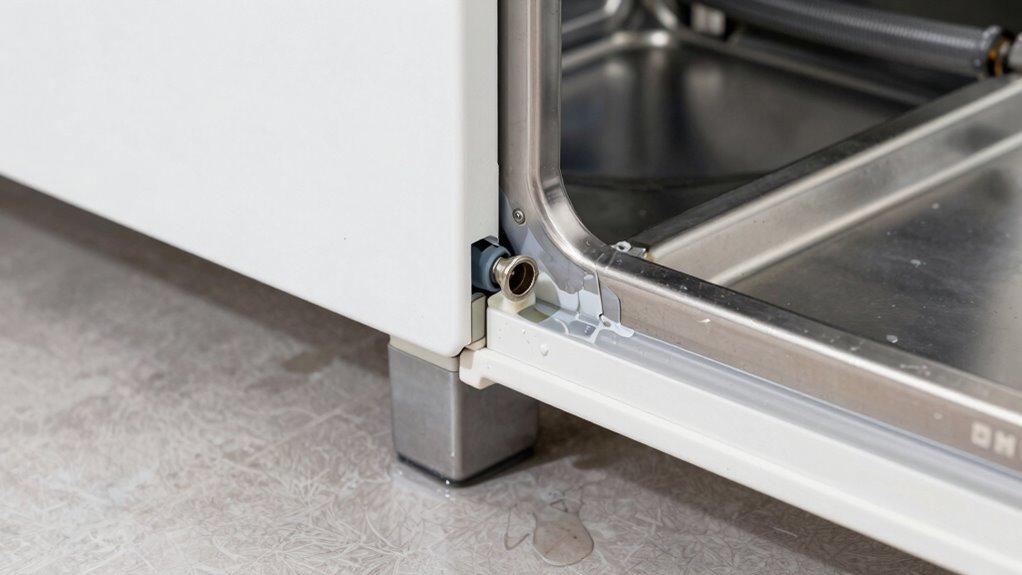
Common Water Supply Mistakes That Cause Leaks
One common mistake is using incorrect fitting techniques, which can lead to leaks and water damage. Faulty water connections are another culprit that often causes issues over time. Making sure fittings are secure and connections are properly installed is essential to prevent water leaks. Additionally, neglecting to check the connection integrity regularly can result in unnoticed leaks developing over time. Regular inspections of water supply lines can help identify early signs of wear or corrosion before leaks occur. Incorporating proper installation methods and ensuring secure fittings can further reduce the risk of future leaks and ensure a longer-lasting dishwasher connection. Being aware of connection standards can also help prevent common installation mistakes that lead to leaks.
Incorrect Fitting Techniques
Incorrect fitting techniques are a common cause of water leaks in countertop dishwashers. When installing your unit, ensure all connections are secure and properly tightened to prevent leaks that can disrupt dishwasher maintenance routines. Using the right fittings and avoiding over-tightening helps maintain a tight seal, reducing the risk of water damage. Poorly fitted hoses or connectors can also hinder energy efficiency by causing leaks that increase water and electricity consumption. Double-check that all fittings are compatible with your dishwasher model and follow the manufacturer’s instructions carefully. Proper fitting techniques are essential for long-term reliability and avoiding costly repairs. Taking the time to verify the correct installation procedures can greatly reduce the likelihood of leaks and ensure your dishwasher operates smoothly and efficiently, saving you money and effort in the long run. Additionally, consulting professional installation guidelines can help identify common pitfalls and ensure optimal setup. Ensuring all components are properly secured can further prevent leaks caused by vibrations or movement over time. Being attentive to connection integrity during installation can also help catch potential issues before they lead to leaks.
Faulty Water Connections
Faulty water connections are a common source of leaks in countertop dishwashers, often resulting from mistakes during installation or maintenance. Mounting issues can cause loose or misaligned hoses, leading to drips and water pooling. Ensure connections are tight but not over-tightened, which can damage fittings. Electrical concerns may arise if water contacts electrical components due to leaks, so check all fittings and ensure proper insulation. Use the correct type of fittings and avoid homemade adapters, which can fail over time. Regularly inspect water supply lines for cracks or corrosion. Properly securing hoses and connections prevents leaks caused by mounting issues. Address electrical concerns immediately if you notice any water near wiring, as this can pose safety hazards and lead to further damage. Additionally, being aware of cookie categories and how they function can help in understanding how online monitoring might detect or prevent some plumbing issues. Monitoring systems can sometimes alert homeowners to developing leaks before significant damage occurs. Employing proper installation practices is crucial to prevent common mistakes that lead to leaks and ensure the longevity of your appliance.

Anchira 3.2 FT Washing Machine Drain Hose, Flexible Dishwasher Drain Hose Extension Kit, Universal Washer Drain Hose, Corrugated Washer Hose with 1 Adapter, 2 Hose Clamps, 1 U-Bend Hose Holder
- Flexible Extension Kit: Includes four connection sizes, customizable length
- High-Quality Material: Made of durable, heat-resistant PP material
- Corugated Design: Prevents kinking, squeezing, and clogging
As an affiliate, we earn on qualifying purchases.
As an affiliate, we earn on qualifying purchases.
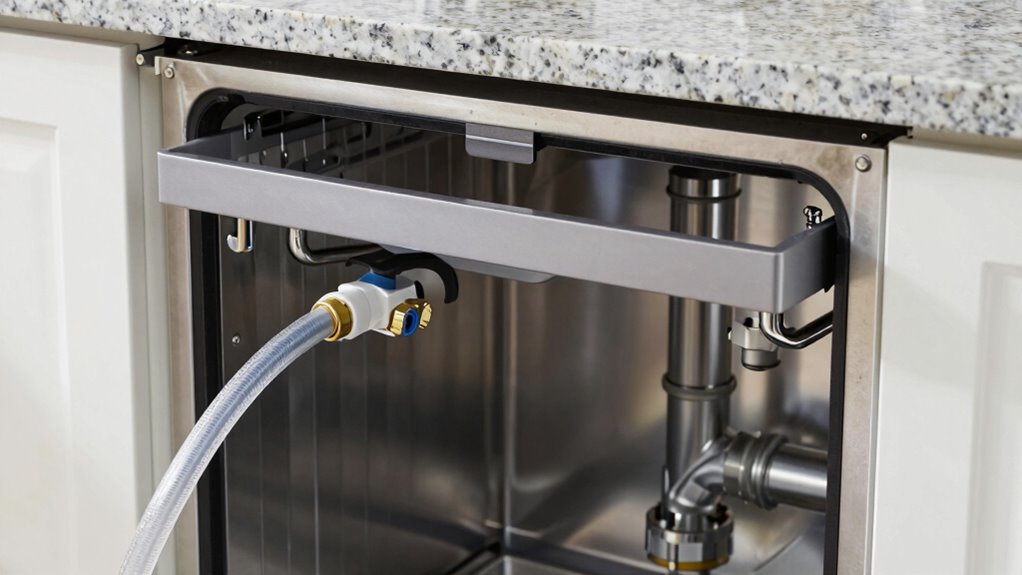
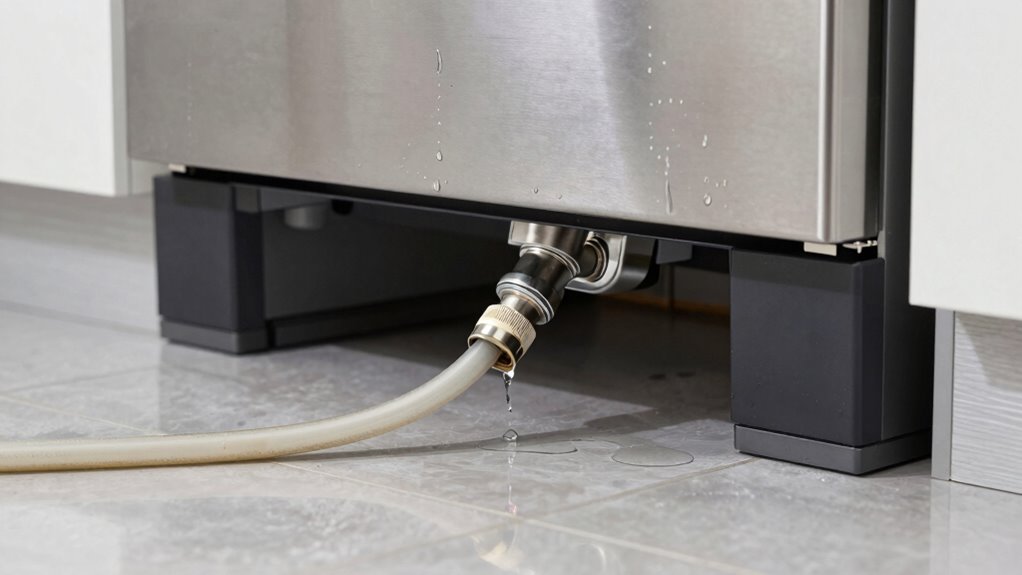
Installing the Drain Hose Correctly for a Leak-Free Fit
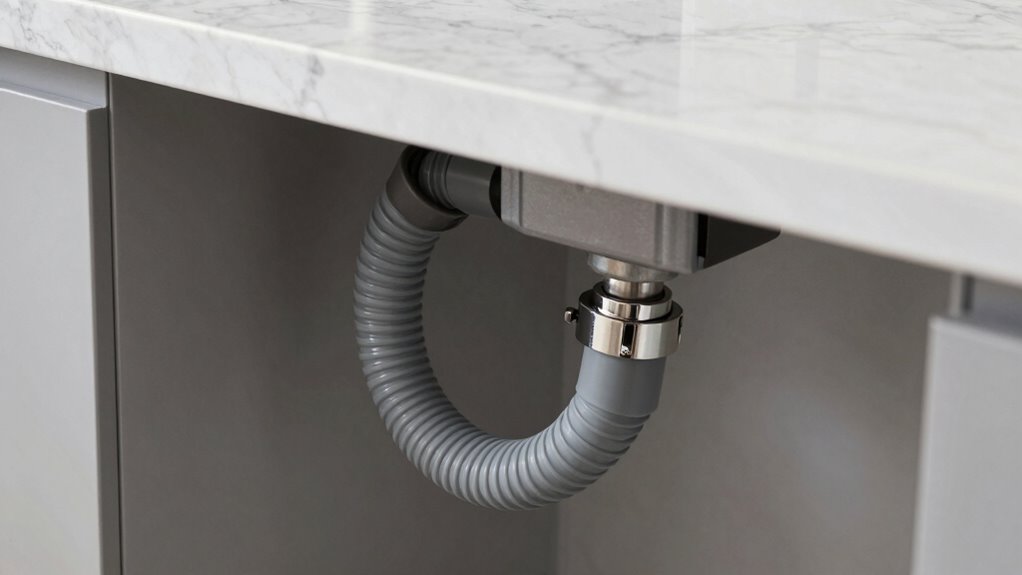
To make certain your countertop dishwasher functions properly and avoids water leaks, it’s essential to install the drain hose correctly. Proper drain hose positioning ensures water flows smoothly without backflow or leaks. First, secure the hose at a slight downward angle to prevent standing water. Avoid kinks or bends that can block drainage. When connecting the hose, consider sealant application around fittings to ensure a tight, leak-proof seal. Here are key steps:
Secure the drain hose at a slight downward angle and avoid kinks for leak-free drainage.
- Position the drain hose about 20 inches above the floor for proper gravity drainage
- Secure the hose firmly to prevent movement or disconnection
- Use sealant around connections for extra leak prevention
- Ensure the hose runs downhill to the drain without sharp bends
Additionally, understanding golf history can remind you of the importance of proper setup and precision in every task. Paying close attention to hose placement and secure connections helps you achieve a leak-free fit and keeps your countertop dry. Proper installation techniques further contribute to maintaining a dry kitchen environment. Recognizing the significance of correct setup aligns with the fundamentals of culinary education, emphasizing accuracy and careful preparation in all aspects of kitchen maintenance.

W11177741 Dishwasher Door Seal for Whirlpool KitchenAid Maytag Kenmore
- Model Number: W11177741 Dishwasher Door Seal
- Easy to Install: Fits top brands including Whirlpool, Kitchenaid, Maytag, Kenmore, Amana
- Replaces Multiple Part Numbers: W10300924VP, PS11722167, AP5983731, etc.
As an affiliate, we earn on qualifying purchases.
As an affiliate, we earn on qualifying purchases.
Choosing and Installing Seals and Gaskets to Stop Leaks
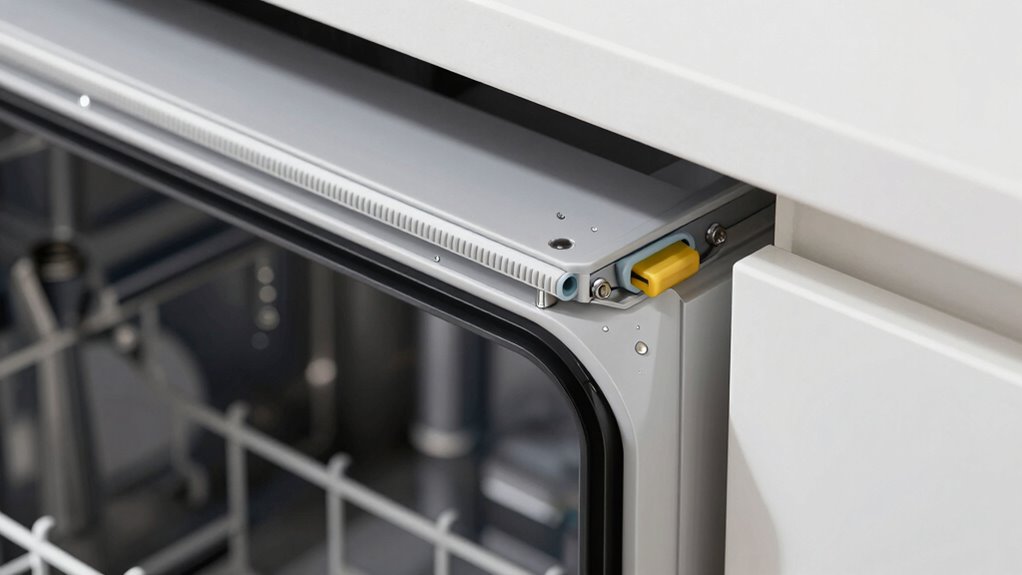
Choosing and Installing Seals and Gaskets to Stop Leaks
Choosing the right seals and gaskets is essential to guarantee leaks and assure your countertop dishwasher operates smoothly. When selecting seal replacement parts, focus on high-quality materials compatible with your model. Proper gasket maintenance involves inspecting seals regularly for cracks, warping, or deterioration. If you notice any damage, replace the gasket promptly to prevent leaks. Make sure seals are fitted securely without over-tightening, which can cause cracks or deformation. Proper installation ensures a tight, water-resistant seal that keeps leaks at bay. Keep spare seals on hand for quick replacement when needed. Regular gasket maintenance prolongs the lifespan of your dishwasher and maintains ideal performance. Incorporating caregiver emotional health practices, like staying organized and managing stress, can help you stay attentive to appliance maintenance needs. Taking these steps helps you avoid costly water damage and keeps your appliance running efficiently.
How Tight Should Fittings Be to Avoid Cracks and Water Damage
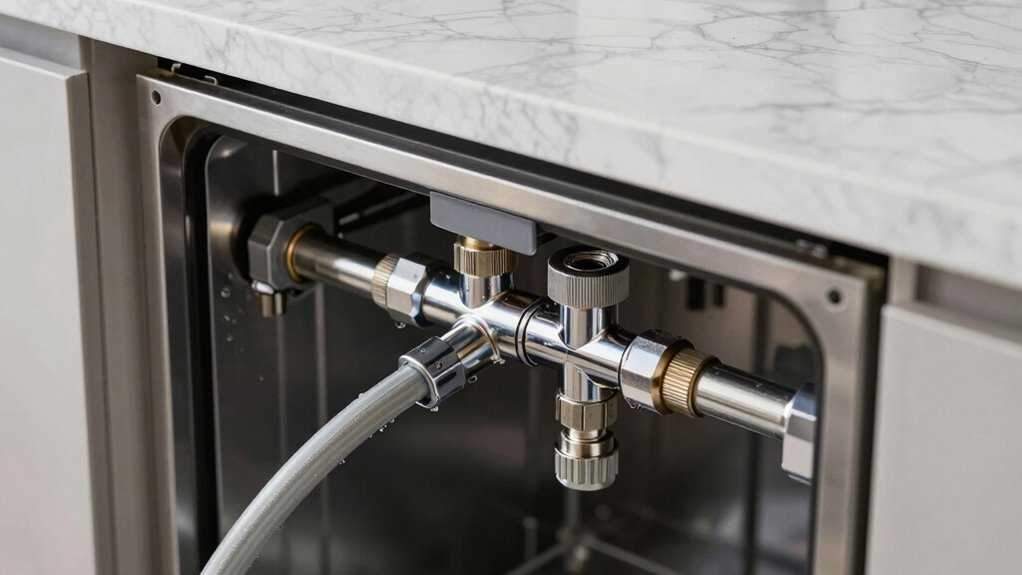
When tightening fittings on your countertop dishwasher, you want to make sure they’re secure but not overly tight. Over-tightening can crack plastic components or damage seals, leading to leaks or water damage. Finding the right balance helps protect your appliance and keeps it running smoothly.
Proper Tightening of Fittings
Properly tightening fittings is essential to prevent cracks and water damage in your countertop dishwasher. Use fitting materials suited for your setup, like flexible hoses or rigid pipes, and refer to the manufacturer’s recommended tightening torque to avoid over-tightening. When tightening fittings, keep these points in mind:
- Use the correct tools to avoid damaging fitting materials.
- Tighten fittings gradually, checking for leaks.
- Avoid excessive force that could crack plastic or deform metal fittings.
- Ensure a snug fit without overtightening, which can cause stress and leaks.
Avoid Over-tightening Risks
Tightening fittings just enough to prevent leaks without applying excessive force helps protect your dishwasher from damage. Over-tightening can crack plastic or bend metal components, especially if water pressure is high. Be mindful of your hose material—rubber hoses are flexible, but tightening too much can weaken their connections, leading to cracks or leaks over time. Use a wrench to snug fittings securely, but stop once you feel resistance. Remember, water pressure varies, so don’t force fittings beyond what feels comfortable. If you notice any signs of strain or leaks after tightening, loosen slightly. Properly secured fittings ensure a secure, leak-free connection without risking damage caused by over-tightening.
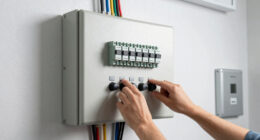
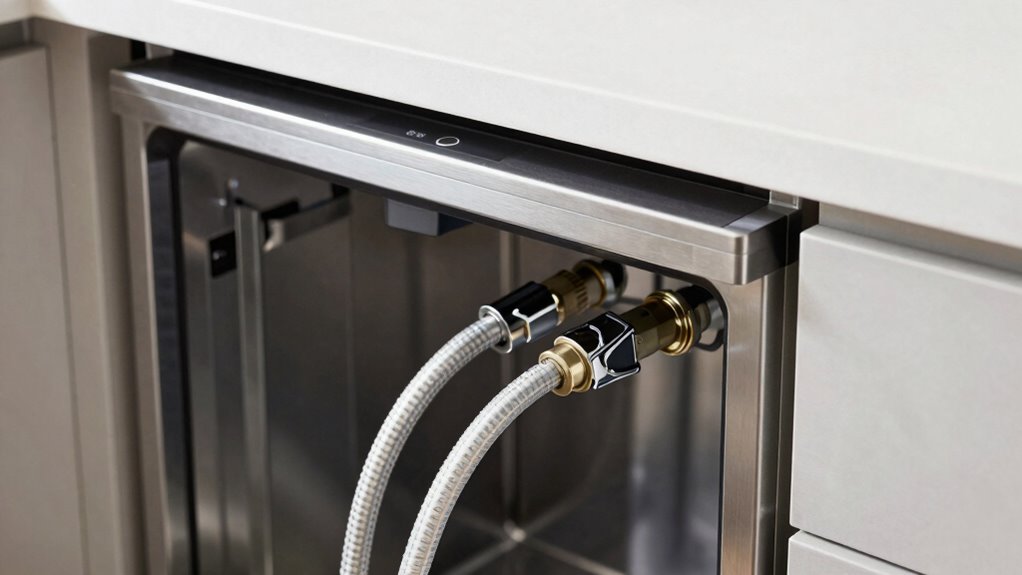
Connecting Power and Water Safely for Leak Prevention
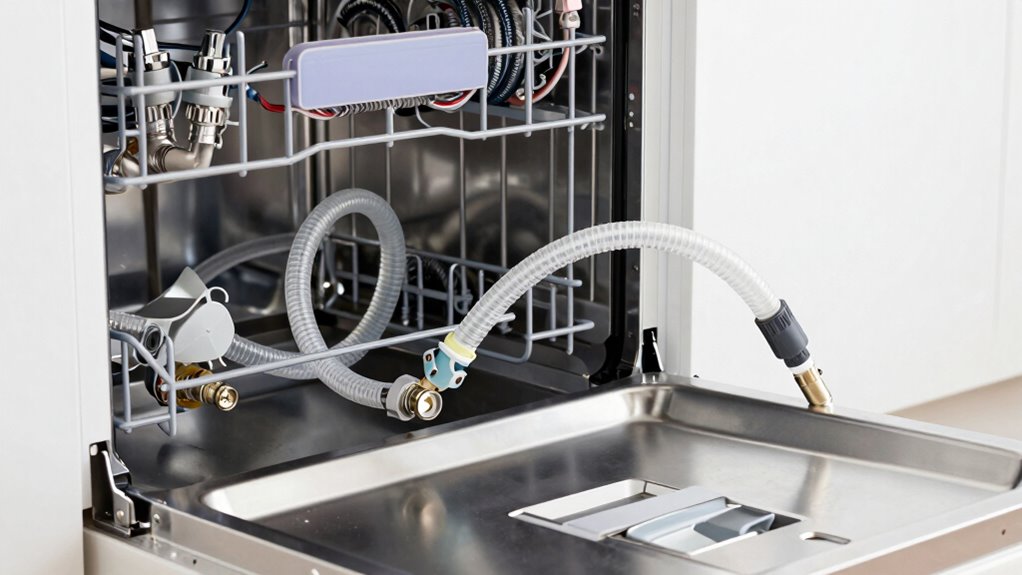
Connecting power and water supplies correctly is essential to prevent leaks and guarantee safe operation. Proper electrical wiring ensures the dishwasher functions smoothly without risking a power surge that could damage the unit or cause electrical hazards. When connecting water, check for secure fittings to avoid drips or leaks. To keep everything safe, remember these tips:
Ensuring proper power and water connections prevents leaks and promotes safe dishwasher operation.
- Use a grounded outlet designed for appliances
- Avoid extension cords; connect directly to a dedicated outlet
- Turn off the water supply before attaching hoses
- Inspect hoses and fittings for tightness and cracks
Leveling Your Countertop Dishwasher to Prevent Spills
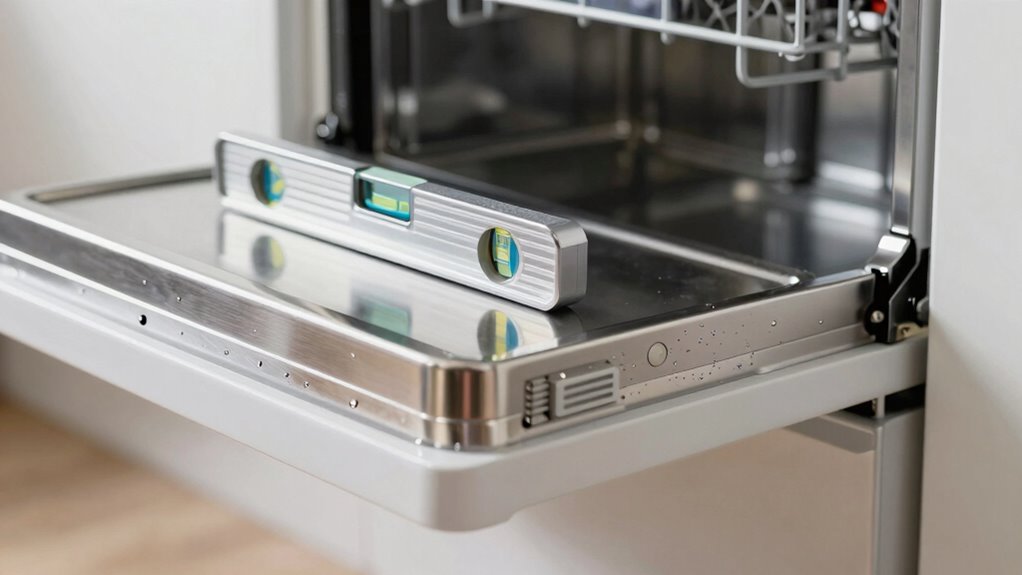
Start by checking if your countertop is level using a spirit level. If it’s uneven, adjust the dishwasher’s feet until it sits flat and stable. Proper leveling helps prevent spills and keeps everything running smoothly.
Check Surface Level
To prevent spills and make certain your countertop dishwasher functions properly, it’s essential to check that it’s level. A surface level ensures the water pressure stays consistent during cycles, preventing leaks caused by uneven placement. If your dishwasher isn’t level, water may not drain properly, leading to spills or damage. To verify the surface level, consider these steps:
- Place a bubble level across the top edge of the dishwasher
- Check for any tilting or wobbling
- Adjust the feet until the bubble is centered
- Confirm the dishwasher sits evenly on the countertop
Ensuring a level surface not only prevents leaks but also optimizes water pressure, ensuring your dishwasher cleans effectively every time. Proper leveling is a simple yet crucial step in setup.
Use a Spirit Level
Using a spirit level is the most straightforward way to guarantee your countertop dishwasher sits perfectly even. Proper leveling is essential for effective installation techniques and preventing leaks. Place the level on the top edge of your dishwasher and check for any tilts. If it’s uneven, adjust the placement or the feet to achieve a flat position. Regularly using a spirit level during setup ensures the appliance is correctly aligned from the start. This simple step also supports maintenance routines by preventing unnecessary wear on components caused by imbalance. An even dishwasher reduces the risk of water spills and operational issues, saving you time and effort. Investing a few moments to level your dishwasher correctly improves its performance and longevity, making your setup both safe and reliable.
Adjust Feet Properly
Adjusting the feet of your countertop dishwasher is essential for guaranteeing it sits level and functions properly. Proper leveling prevents leaks caused by uneven cabinet material or mismatched countertop height. To do this effectively:
- Use a spirit level to check if the dishwasher is even from front to back and side to side.
- Adjust the feet until the bubble in the level is centered, ensuring stability.
- Consider the cabinet material, as some may flex or settle over time, affecting levelness.
- Make sure the dishwasher’s height matches your countertop height for a secure fit and to avoid spills.
A well-leveled dishwasher helps prevent leaks and ensures efficient operation, protecting your cabinetry and countertop from water damage.
Signs of Setup Errors That Could Lead to Water Damage
Many setup errors can quietly lead to water damage if left unchecked. Keep an eye out for signs like water pooling beneath your countertop dishwasher or frequent leaks during cycles. Improperly aligned or loose connections can cause drainage issues, leading to water escaping. If you notice water stains or mold around the appliance, it’s a sign you might have setup errors affecting countertop maintenance. Also, pay attention to your dishwasher features—if it’s not filling or draining properly, it could be due to incorrect hose placement or loose fittings. These issues often stem from setup mistakes that seem minor but can cause significant water damage over time. Regularly inspecting your installation helps catch problems early, preventing costly repairs and ensuring your countertop remains dry and safe.
Step-by-Step Checklist to Inspect Your Dishwasher Installation
Start your inspection by gathering a few basic tools, such as a flashlight and a towel, to help identify potential issues. Make certain your dishwasher is properly leveled and securely installed. Check the water inlet and drain hoses for tight fittings and any signs of leaks or damage. Confirm that the power connection is stable and the unit is plugged in correctly. Examine the door seal for cracks or debris that could cause leaks. Inspect the drain filter and spray arms for blockages or buildup. During this process, refer to troubleshooting guides for common setup errors. Proper dishwasher maintenance includes regularly checking these components. This step-by-step checklist helps prevent leaks and ensures your countertop dishwasher operates smoothly, saving you from costly repairs down the line.
What to Do If Your Dishwasher Still Leaks After Setup

If your countertop dishwasher continues to leak after initial setup, it’s important to identify the source of the problem before attempting further fixes. Leaks often stem from issues with dishwasher maintenance or incorrect water pressure. Check for loose hoses, worn gaskets, or improper installation angles. Also, verify that the water pressure isn’t too high, as it can cause leaks. Proper maintenance, like cleaning filters and inspecting seals, can prevent recurring leaks. Here’s a quick troubleshooting guide:
| Issue | Solution |
|---|---|
| Loose or damaged hoses | Tighten or replace hoses |
| Worn door gasket | Replace gasket to ensure a tight seal |
| Excessive water pressure | Adjust water supply to recommended levels |
| Clogged filters | Clean filters to prevent buildup and leaks |
Frequently Asked Questions
What Are Common Signs of Hidden Leaks After Installation?
You might notice water pooling around your dishwasher or damp spots on the floor, signaling hidden leaks. Check for drain hose issues, like kinks or loose fittings, which often cause leaks. Also, inspect electrical connections for moisture or corrosion, as these can lead to leaks or electrical problems. Unusual noises or a decrease in washing performance can also indicate hidden issues. Regularly monitoring these signs helps prevent major water damage.
How Often Should I Inspect My Countertop Dishwasher for Leaks?
You should inspect your countertop dishwasher for leaks weekly, keeping a sharp eye on hoses, seals, and the surrounding area. Follow your installation checklist and maintenance tips to guarantee everything remains secure and dry. Regular inspections help catch small drips before they turn into major leaks. By making this routine part of your maintenance, you protect your appliance and prevent potential water damage, giving you peace of mind.
Can Improper Placement Affect Dishwasher Longevity?
Yes, improper placement can affect your dishwasher’s longevity. Follow installation tips to guarantee it’s level and stable, preventing strain on components. Proper placement helps avoid leaks and reduces wear over time. Incorporate routine maintenance routines like checking hoses and seals, which prolongs its lifespan. A well-placed dishwasher operates efficiently and lasts longer, saving you money and hassle. Always double-check your setup and maintain it regularly for peak performance.
What Tools Are Recommended for Secure Fittings?
You should use fitting tools like adjustable wrenches and pliers to guarantee secure connections. These tools help tighten fittings without damaging them. Additionally, applying sealant options such as pipe joint compound or silicone sealant can prevent leaks by creating a watertight seal. Always double-check your fittings after installation and ensure everything is snug but not overtightened to avoid damaging the threads or causing leaks.
Are There Specific Brands More Prone to Setup Leaks?
You might notice some brands are more prone to setup leaks due to installation errors or manufacturer defects. While no brand is completely immune, cheaper models often have less precise fittings, leading to leaks if installed improperly. Always double-check your connections and follow the manufacturer’s instructions carefully. Investing in reputable brands with good reviews can reduce the risk, but proper installation remains essential regardless of the brand you choose.
Conclusion
If you ignore these setup tips, your countertop dishwasher can turn into a water disaster waiting to happen—flooding your kitchen, damaging your cabinets, and causing chaos. But if you follow these steps carefully, you’ll keep leaks at bay, protect your home, and enjoy spotless dishes without a single drip of worry. Don’t let a small mistake become a flood; set it up right and keep your kitchen dry and happy!