
To fix collapsed loaves, guarantee your dough is properly activated with warm water and fresh yeast, and avoid over-kneading, which weakens gluten. Proof your dough in a warm, draft-free environment until it doubles in size and passes the poke test. Don’t over-proof, as it weakens the structure further. Paying attention to ingredient quality and timing can make a big difference. You’ll discover more tips to prevent loaf collapse and improve your baking success if you keep exploring.
Key Takeaways
- Ensure proper kneading to develop strong gluten, supporting dough elasticity and preventing collapse during baking.
- Proof dough in a warm, draft-free environment until it doubles in size for optimal rise.
- Avoid over-proofing by monitoring dough growth; use the poke test to check readiness.
- Use fresh yeast and accurate ingredient measurements to promote consistent fermentation and structure.
- Maintain proper water temperature and proofing conditions to support healthy yeast activity and dough stability.
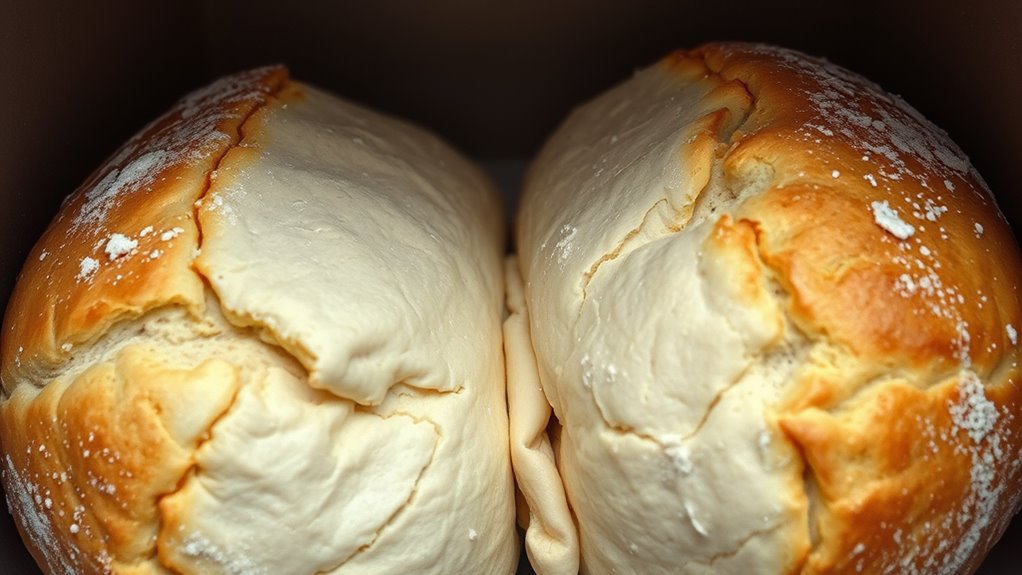
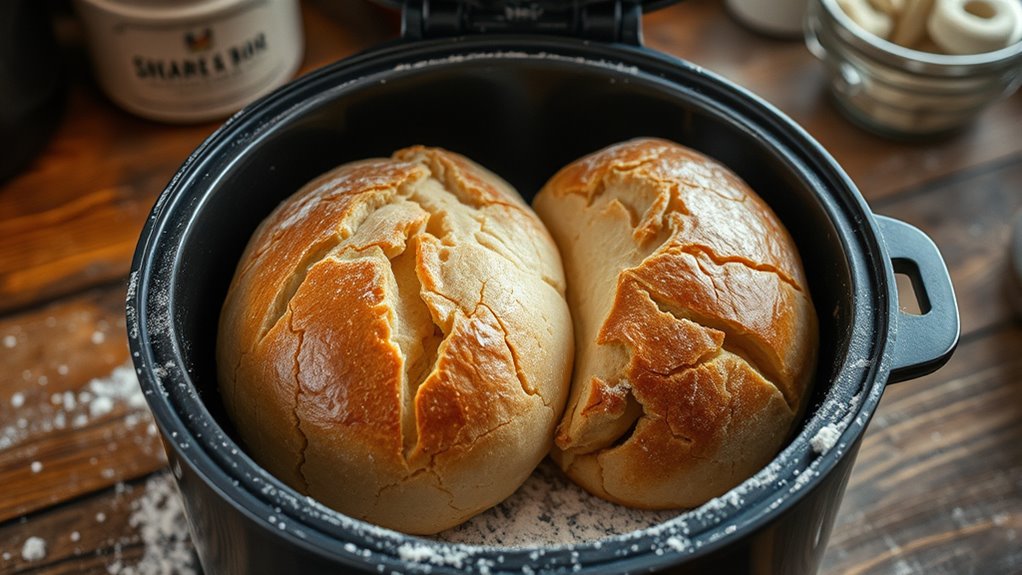
If you’ve ever used a bread maker and ended up with a collapsed loaf, you’re not alone. It’s a common frustration and often points to issues in the dough’s preparation or how it was handled during proofing. One key factor that influences the structure of your bread is yeast activation. If the yeast isn’t properly activated, it won’t produce enough carbon dioxide to give your bread the rise it needs. To guarantee yeast activation goes smoothly, always use the right water temperature—warm but not hot—and mix the yeast with a small amount of sugar and water beforehand. This quick proof helps confirm that your yeast is alive and active before you incorporate it into the rest of the ingredients. Skipping this step or using water that’s too hot can kill the yeast, resulting in dense or collapsed bread.
Another vital aspect is kneading techniques. Proper kneading develops gluten, which gives the dough elasticity and strength needed to trap carbon dioxide produced during fermentation. If you under-knead, the dough won’t have enough structure, leading to a loaf that collapses after baking. Over-kneading, though less common in bread machines, can also weaken the dough structure. When using a bread maker, guarantee you follow the recommended kneading cycle closely, but if you’re hand-kneading, aim for a smooth, slightly tacky dough that stretches without tearing. Proper kneading creates a uniform gluten network, which supports the bread’s rise and prevents collapse.
Timing and environment matter too. If you proof your dough in a drafty or cold space, yeast activity slows down, producing less gas, and the dough may not rise enough or could collapse later. Conversely, over-proofing—leaving the dough to rise too long—causes the gluten structure to weaken, making the loaf prone to collapsing during baking. Keep an eye on your dough’s size; it should roughly double in volume during proofing. When in doubt, use the poke test: gently press your finger into the dough; if the indentation springs back slowly, it’s ready. If it doesn’t spring back, it may be over-proofed.
Additionally, the quality of ingredients can significantly impact the dough’s ability to rise properly. Remember that the quality of ingredients plays a role. Fresh yeast, proper flour, and accurate measurements all contribute to a stable rise. If you’re consistently seeing collapsed loaves, review your yeast activation process, refine your kneading techniques, and guarantee proofing conditions are ideal. With a little attention to these details, you’ll improve your chances of baking a tall, fluffy loaf that holds its shape.
Frequently Asked Questions
Can I Use Gluten-Free Flour in My Bread Maker?
Yes, you can use gluten-free flour in your bread maker, but you’ll need to adapt your approach. Gluten-free baking requires different techniques, so look for bread machine tips tailored for gluten-free dough. Use a binder like xanthan gum, and consider adding extra liquids to achieve the right consistency. Experiment with small batches first, and follow specific recipes for gluten-free bread to ensure your loaves turn out perfect.
How Do I Prevent Over-Proofing in Bread Machines?
Imagine your loaf collapsing just as it’s about to finish baking—that’s over-proofing. To prevent this, monitor proofing times closely using the bread machine’s settings or proofing techniques. Keep an eye on dough consistency—if it’s overly airy or sticky, it’s a sign to stop proofing sooner. Adjust time accordingly, and your bread will rise perfectly without over-proofing, giving you a fluffy, well-shaped loaf every time.
What Is the Ideal Proofing Temperature for Bread Makers?
The ideal proofing temperature for your bread maker is around 75°F to 80°F, creating a perfect proofing environment. This temperature activates the yeast efficiently without overproofing. You want a warm, draft-free spot inside the machine or use the proof setting if available. Maintaining this temperature guarantees proper yeast activation and dough rise, preventing collapsed loaves and ensuring your bread turns out light and fluffy every time.
Can I Manually Adjust the Kneading Cycle for Better Dough?
Yes, you can manually adjust the kneading cycle for better dough. Most bread makers allow you to customize the kneading time or select different settings. Check your machine’s manual to see if it offers this feature. By tweaking the manual adjustment of the kneading cycle, you’ll guarantee the dough develops proper gluten structure, resulting in a better rise and texture. Experimenting with these settings can improve your bread making results markedly.
How Do I Troubleshoot a Bread Maker That Won’T Start?
Did you know nearly 30% of bread machine issues stem from simple troubleshooting startup problems? To fix a bread maker that won’t start, first check the power cord and outlet—make certain they’re working. Clean the contacts and reset the machine if needed. Regular bread machine maintenance helps prevent these problems, so ensure the lid is securely closed and the pan is properly inserted. If issues persist, consult the user manual or seek professional repair.
Conclusion
Just like Icarus learned when flying too close to the sun, pushing your bread too far can lead to collapse. But with a little patience and proper fixing, you can rise above the mishaps and craft perfect loaves. Think of these tips as your secret recipe to avoid a downfall, turning your bread maker into a trusty companion. Keep experimenting, stay patient, and soon you’ll be the master of your own bakery—without the crash landing.