
To remove mold from bathroom silicone without recaulking, first identify the mold and prepare your supplies, including gloves, masks, and cleaning solutions like vinegar or hydrogen peroxide. Apply the solution evenly, let it sit, then scrub gently to loosen mold. Rinse thoroughly, dry completely, and guarantee proper ventilation to prevent future growth. If mold persists or silicone is damaged, replacing might be necessary—learn more about keeping your bathroom mold-free.
Key Takeaways
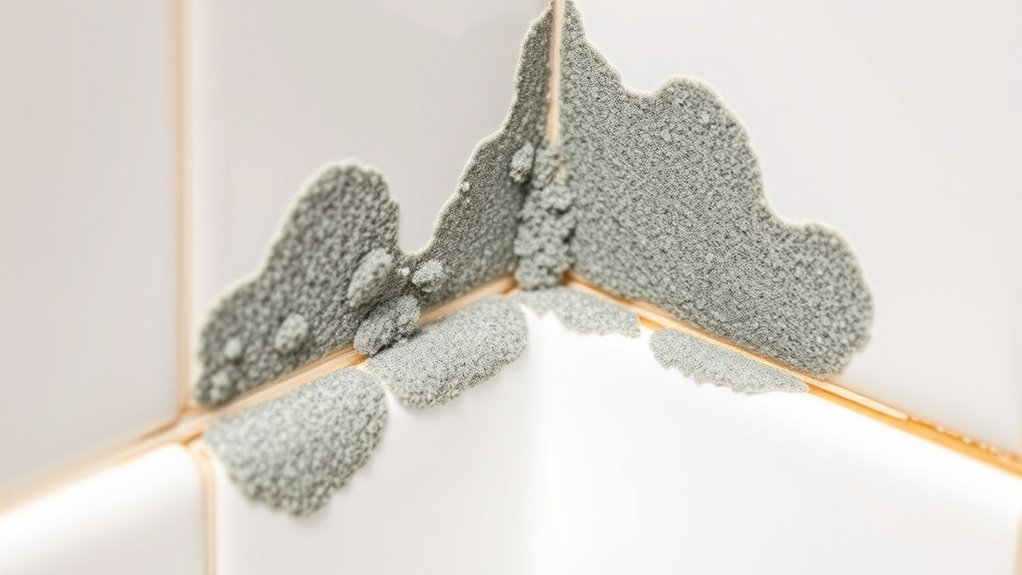
- Identify mold growth on silicone by dark spots, fuzzy textures, or discoloration, especially in humid bathroom areas.
- Apply a bathroom-safe mold-removal solution evenly, allowing proper dwell time to break down mold spores.
- Gently scrub the silicone with a soft brush or sponge, then rinse thoroughly to remove residue.
- Dry the silicone completely with a cloth or towel to prevent moisture buildup and future mold growth.
- Improve ventilation, regularly clean with mold-resistant solutions, and maintain dry conditions to prevent recurring mold without recaulking.
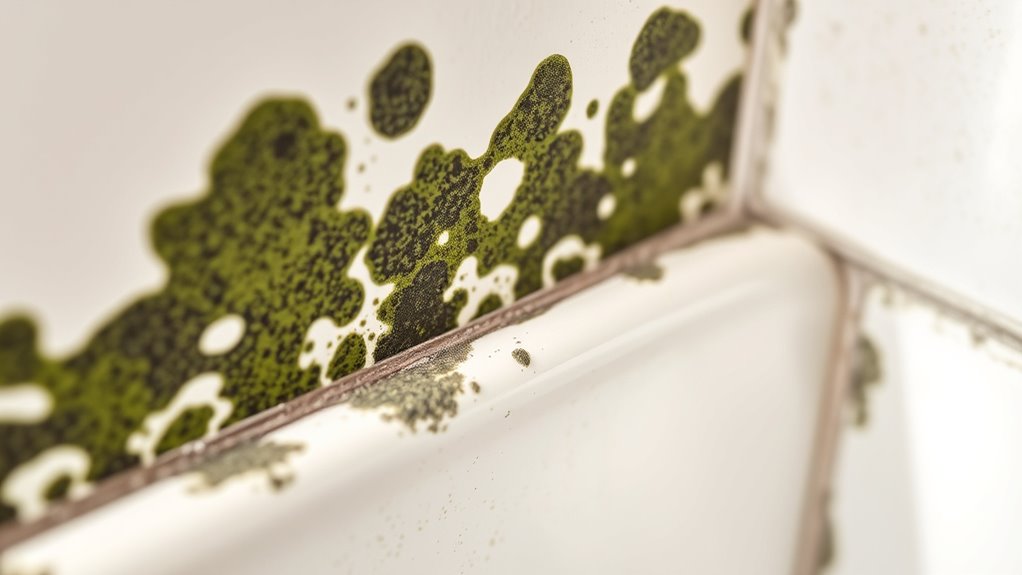
Identifying Mold on Bathroom Silicone

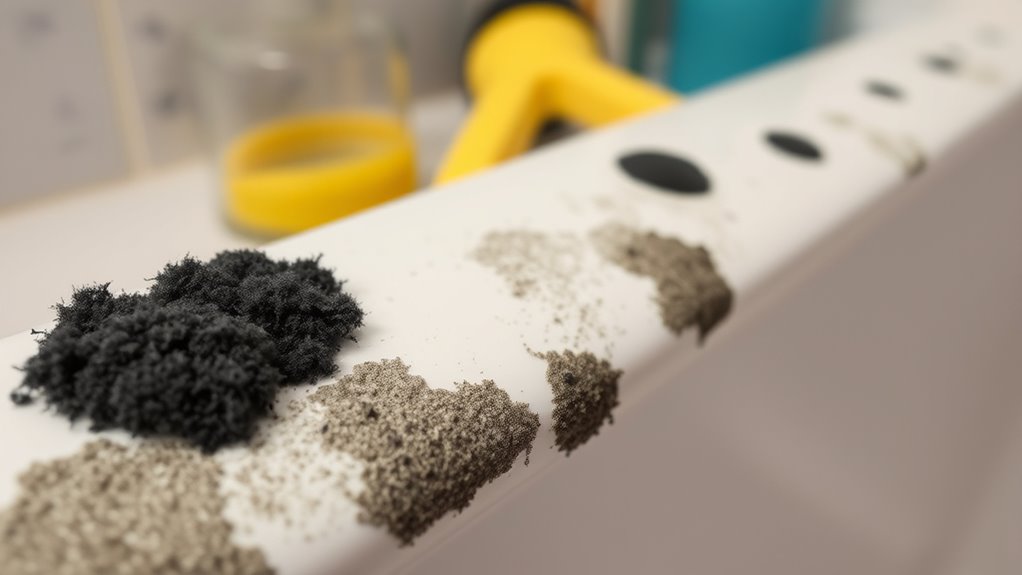
Mold often appears on bathroom silicone as dark spots or streaks that stand out against the usually white or clear sealant. To identify it, look for fuzzy or slimy growths that don’t wipe away easily. Mold types vary, including black mold, which is common and potentially harmful, and green or gray mold, which can also grow on silicone. Pay attention to signs of silicone deterioration, such as cracking, peeling, or discoloration, as these create ideal spots for mold to thrive. Mold thrives in damp, humid environments, so if you notice dark patches near your shower or bathtub seams, it’s likely mold. Recognizing the difference between mold and soap scum isn’t hard—mold tends to have a fuzzy texture and musty smell. Additionally, proper ventilation helps prevent mold growth by reducing moisture buildup in the bathroom.
Preparing Your Cleaning Supplies
Before you start cleaning, gather all necessary supplies to guarantee an efficient and thorough process. Being prepared helps you tackle mold effectively and keeps you safe. Make sure you have the right cleaning tools, such as scrub brushes and sponges, to remove mold without damaging the silicone. Protect yourself with gear like gloves, masks, and goggles to avoid exposure to mold spores and harsh chemicals. Here are four essential items to gather:
- Scrub brushes and sponges
- Protective gloves and mask
- Spray bottles with cleaning solutions
- Cloths or paper towels for wiping
Having these supplies ready means you won’t waste time searching mid-cleaning, allowing you to focus on removing mold safely and efficiently. Proper preparation sets the stage for a successful mold removal process. Additionally, understanding security measures in payment processing can help protect your financial information during online transactions.
Applying a Mold-Removal Solution

Choose a mold-removal solution that’s strong enough to tackle the mildew but safe to use around your bathroom. Apply it evenly across the silicone to make certain all moldy areas are covered without excess spillage. Let it sit for the recommended time to give it a chance to break down the mold effectively. Incorporating a mild cleaning agent can help prevent future mold growth while ensuring your silicone remains intact.
Select Effective Solution
To effectively remove mold from bathroom silicone, selecting the right mold-removal solution is vital. You want something powerful enough to eliminate mold and prevent future growth. Consider using commercial mold removers or natural options like vinegar or hydrogen peroxide. Additionally, incorporating mold resistant paint after cleaning can help keep mold at bay. Improving bathroom ventilation is also essential, as it reduces moisture that fosters mold growth.
Here are four effective solutions:
- Use a commercial mold remover for quick results.
- Apply vinegar or hydrogen peroxide for a natural approach.
- Seal silicone with mold resistant paint to prevent future growth.
- Increase bathroom ventilation with exhaust fans or open windows.
Choosing the right solution guarantees a mold-free, healthier bathroom environment.
Apply Evenly and Safely
Applying your chosen mold-removal solution evenly guarantees thorough contact with affected areas, maximizing mold elimination. Use a spray bottle or cloth to distribute the solution across the silicone surface, ensuring every crevice is covered. This uniform application not only targets existing mold but also supports mold prevention by reducing future growth. Be cautious to avoid excessive use, which can lead to oversaturation and potential damage to the silicone. Proper application also contributes to silicone maintenance by preventing mold buildup that can degrade the material over time. Take your time to cover all affected spots and surrounding areas evenly. Consistent, safe application helps keep your bathroom mold-free and preserves the integrity of your silicone seals. Effective application techniques ensure the best results and prolong the lifespan of your silicone.
Allow Proper Dwell Time
Allowing the mold-removal solution to sit on the silicone for the recommended amount of time is essential for effective mold elimination. This dwell time ensures the solution penetrates mold spores, breaking their grip and preventing future growth. Rushing this step can compromise mold prevention and weaken your silicone sealing. To maximize results:
- Feel confident knowing you’re actively protecting your bathroom’s health.
- Experience relief as mold struggles to regain footing, safeguarding your family’s well-being.
- Enjoy the satisfaction of a cleaner, mold-free surface that looks like new.
- Know that your effort preserves the integrity of your silicone sealing, avoiding costly replacements.
- Remember that proper dwell time is a crucial step in maintaining a healthy and mold-free bathroom environment.
Scrubbing the Affected Areas
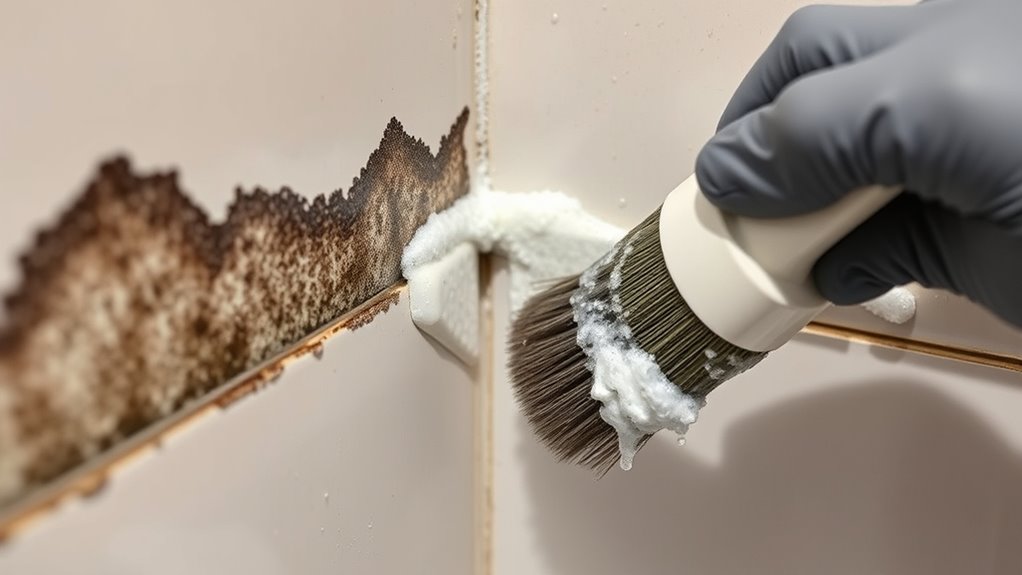
To remove mold effectively, start by using a stiff brush to scrub the affected silicone thoroughly. Next, apply a mold cleaner and let it sit for a few minutes before rinsing. Finally, dry the area completely to prevent mold from returning.
Use a Stiff Brush
A stiff brush is essential for effectively removing mold from bathroom silicone, especially in stubborn or heavily affected areas. It helps scrub away mold spores that softer tools might miss, making your efforts more successful. As you scrub, remember that good bathroom ventilation prevents mold from returning, and cleaning thoroughly is key to mold prevention. Using a stiff brush also ensures that you are removing surface contaminants effectively, which is important because indoor air quality can be significantly impacted by mold presence. Here are four reasons to use a stiff brush: 1. It dislodges stubborn mold buildup quickly. 2. It reaches into crevices that soft brushes can’t. 3. It makes your cleaning more efficient, saving time. 4. It helps maintain long-term silicone integrity by removing mold before it spreads. Always use a stiff brush with proper ventilation to keep your bathroom mold-free and prevent future growth.
Apply a Mold Cleaner
Applying a mold cleaner is an essential step to effectively eliminate mold from bathroom silicone. Choose a cleaner specifically designed to target mold and mildew, as these products help break down mold spores and prevent future growth. Spray the cleaner generously onto the affected silicone sealant, ensuring full coverage of all moldy areas. Let it sit for the recommended time to maximize its mold prevention properties. Using a stiff brush, scrub the silicone thoroughly, focusing on areas with visible mold. This process not only removes existing mold but also helps keep the silicone sealant in good condition. Regular use of a mold cleaner can prolong the life of your bathroom silicone and reduce the likelihood of mold returning. Incorporating mold-resistant products into your routine can further help prevent mold buildup over time.
Rinse and Dry Thoroughly
After letting the mold cleaner sit for the recommended time, it’s important to thoroughly rinse the silicone to remove loosened mold and cleaner residue. Use clean water and a soft cleaning tool, like a sponge or brush, to gently scrub away any remaining debris. Rinse until the water runs clear, ensuring no residue is left behind that could promote mold growth. Once clean, dry the area completely with a towel or cloth to prevent moisture buildup. Proper rinsing and drying are essential for mold prevention and maintaining a fresh bathroom. Taking these steps gives you peace of mind knowing your silicone is clean and mold-free. Remember, consistent cleaning tools and thorough drying are your best defense against future mold problems. Additionally, ventilation and airflow, such as using an exhaust fan or opening windows, help reduce moisture levels and inhibit mold growth over time.
Rinsing and Drying the Sealant

Once you’ve scrubbed the mold from the silicone sealant, it is essential to rinse away any residue thoroughly. Use clean water to wash away loosened mold and cleaning agents, ensuring no remnants remain. Rinsing helps prevent mold from returning and maintains the sealant’s effectiveness. After rinsing, dry the area completely with a clean towel or cloth, which discourages moisture buildup that promotes mold growth. Consider switching to mold resistant sealants for better long-term protection, especially in high-moisture areas like bathrooms. Proper silicone maintenance involves regular cleaning and ensuring the sealant stays dry. Avoid leaving water streaks or damp patches, as these conditions favor mold. Rinsing and drying effectively keep your silicone fresh and mold-free without the need for recaulking.
Preventing Future Mold Growth

Maintaining a mold-free bathroom requires ongoing effort beyond rinsing and drying the sealant. To prevent future mold growth, focus on these key steps:
Consistent ventilation and mold-resistant products are key to a mold-free bathroom environment.
- Install proper ventilation improvements to reduce humidity and moisture buildup.
- Use mold resistant products on seams and grout lines to inhibit mold growth.
- Keep the bathroom well-ventilated even after showers, using exhaust fans or open windows.
- Regularly clean surfaces with mold-inhibiting solutions to maintain a healthy environment.
- Incorporate humidity control devices, such as dehumidifiers, to further reduce moisture levels in the bathroom.
When to Consider Replacing Silicone

Knowing when to replace your bathroom silicone is essential to keeping mold at bay and ensuring a secure seal. If the silicone is cracked, peeling, or shows persistent mold despite cleaning, it’s time for a silicone replacement. Old, damaged silicone allows moisture to seep in, fostering mold growth and compromising the seal’s integrity. Regular inspections help identify these issues early. Consider replacing silicone if it becomes discolored or develops mold stains that won’t clean off. Replacing silicone not only improves appearance but is key for mold prevention. Additionally, understanding potential pitfalls in adopting new payment technologies can help avoid operational issues if you plan to upgrade your bathroom’s fixtures with modern features.
Tips for Maintaining a Mold-Free Bathroom
Keeping your bathroom mold-free requires regular cleaning and proper ventilation. Mold prevention starts with consistent habits that keep moisture levels low. Here are four essential tips:
- Ventilate after showers—use an exhaust fan or open a window to reduce humidity.
- Wipe down surfaces—dry walls and silicone edges to prevent water buildup.
- Clean regularly—use mold-resistant cleaners on grout and silicone.
- Check ventilation tips—ensure your exhaust fan works efficiently and vents outside.
- Consider incorporating diverse designs and materials from indoor gardening options to enhance bathroom decor while maintaining a mold-free environment.
Frequently Asked Questions
Can Mold on Silicone Cause Health Problems?
Yes, mold on silicone can cause health problems. Mold growth releases spores and irritants that may trigger allergies, asthma, or respiratory issues. If you breathe in mold spores regularly, you could experience symptoms like coughing, sneezing, or throat irritation. It’s important to remove mold promptly and keep your bathroom dry to prevent health risks. Regular cleaning and proper ventilation help control mold growth and protect your health.
Is It Safe to Use Bleach on Bathroom Silicone?
Using bleach on bathroom silicone can be safe if you follow proper bleach safety guidelines, but it may cause silicone damage over time. You should dilute the bleach properly and avoid leaving it on the silicone for too long. Always test a small, hidden area first. If used carefully, bleach can effectively remove mold without harming the silicone, but prolonged exposure could weaken or discolor it.
How Often Should I Inspect for Mold?
You should inspect your bathroom silicone weekly to catch mold before it spreads like wildfire. Regular mold prevention and silicone maintenance are your best defenses against a mold invasion. If you see any discoloration or a musty smell, tackle it immediately. Staying vigilant makes mold control easier, saves you money, and keeps your bathroom fresh. Don’t wait for mold to take over—make inspection a quick, routine habit!
Are There Natural Alternatives to Chemical Cleaners?
Yes, there are natural remedies you can try instead of chemical cleaners. Homemade solutions like a mixture of white vinegar and water or baking soda paste effectively eliminate mold without harsh chemicals. Spray or apply these remedies directly on the moldy silicone, let them sit for a while, then scrub gently. Regular use of these natural remedies keeps your bathroom fresh and mold-free without relying on commercial cleaners.
Will Cleaning Remove Mold Completely or Just Temporarily?
Cleaning can effectively remove mold from bathroom silicone, but it might not guarantee permanent results. Mold removal depends on thoroughness, so you must scrub, disinfect, and dry the area properly. Regular silicone cleaning prevents mold buildup, yet if spores remain, mold can return. For lasting protection, consider combining cleaning with mold-resistant treatments. This proactive approach guarantees you’re not just temporarily removing mold but also minimizing future growth.
Conclusion
By tackling mold early, you’re like a shield against hidden decay, keeping your bathroom fresh and your space inviting. With each careful scrub and thorough dry, you breathe new life into your sealant—restoring its strength and clarity. Think of your bathroom as a sanctuary, where cleanliness guards against unseen threats. When you maintain diligently, mold’s dark shadow will never find a place to settle, letting your space shine bright and clean, day after day.